- February 10, 2023
- Anne-Marie Brunet
Anne-Marie Brunet, CMKBD, CAPS
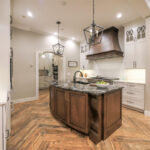
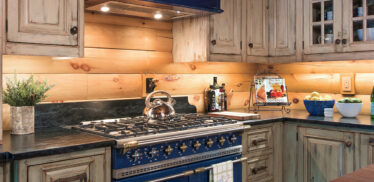
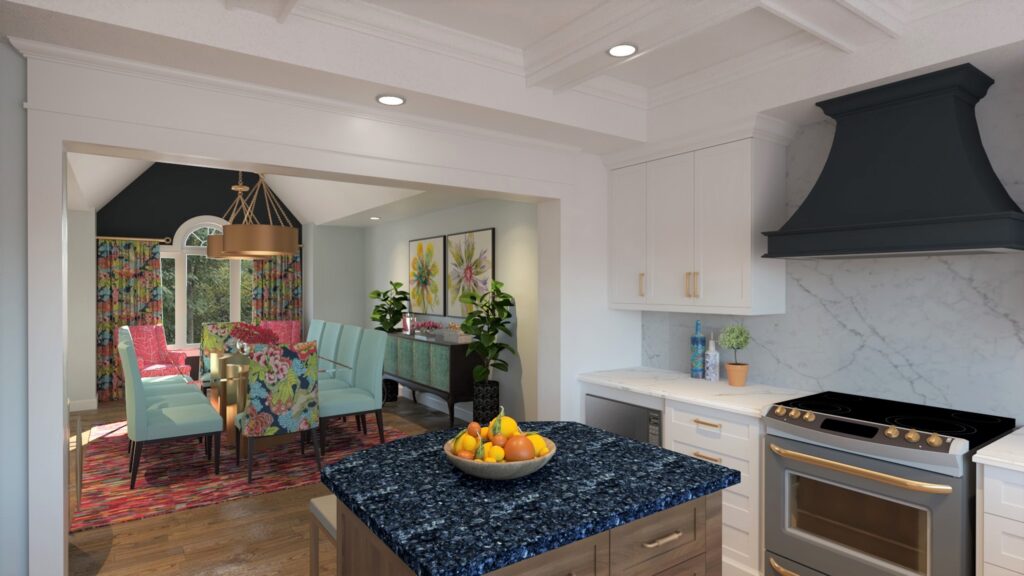
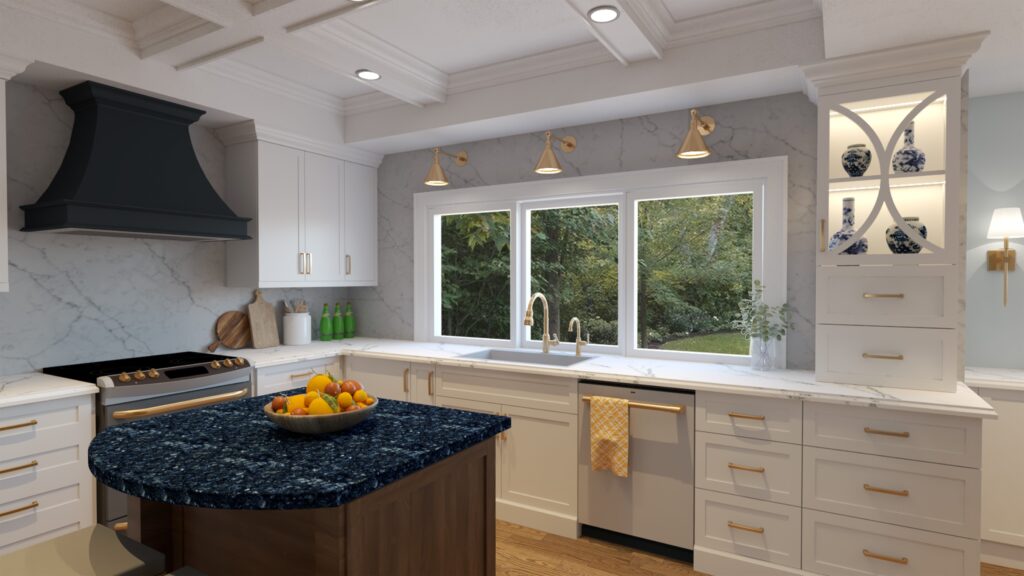
The transformation of this dated kitchen into this gorgeous traditional blue and white kitchen is nothing short of fabulous!
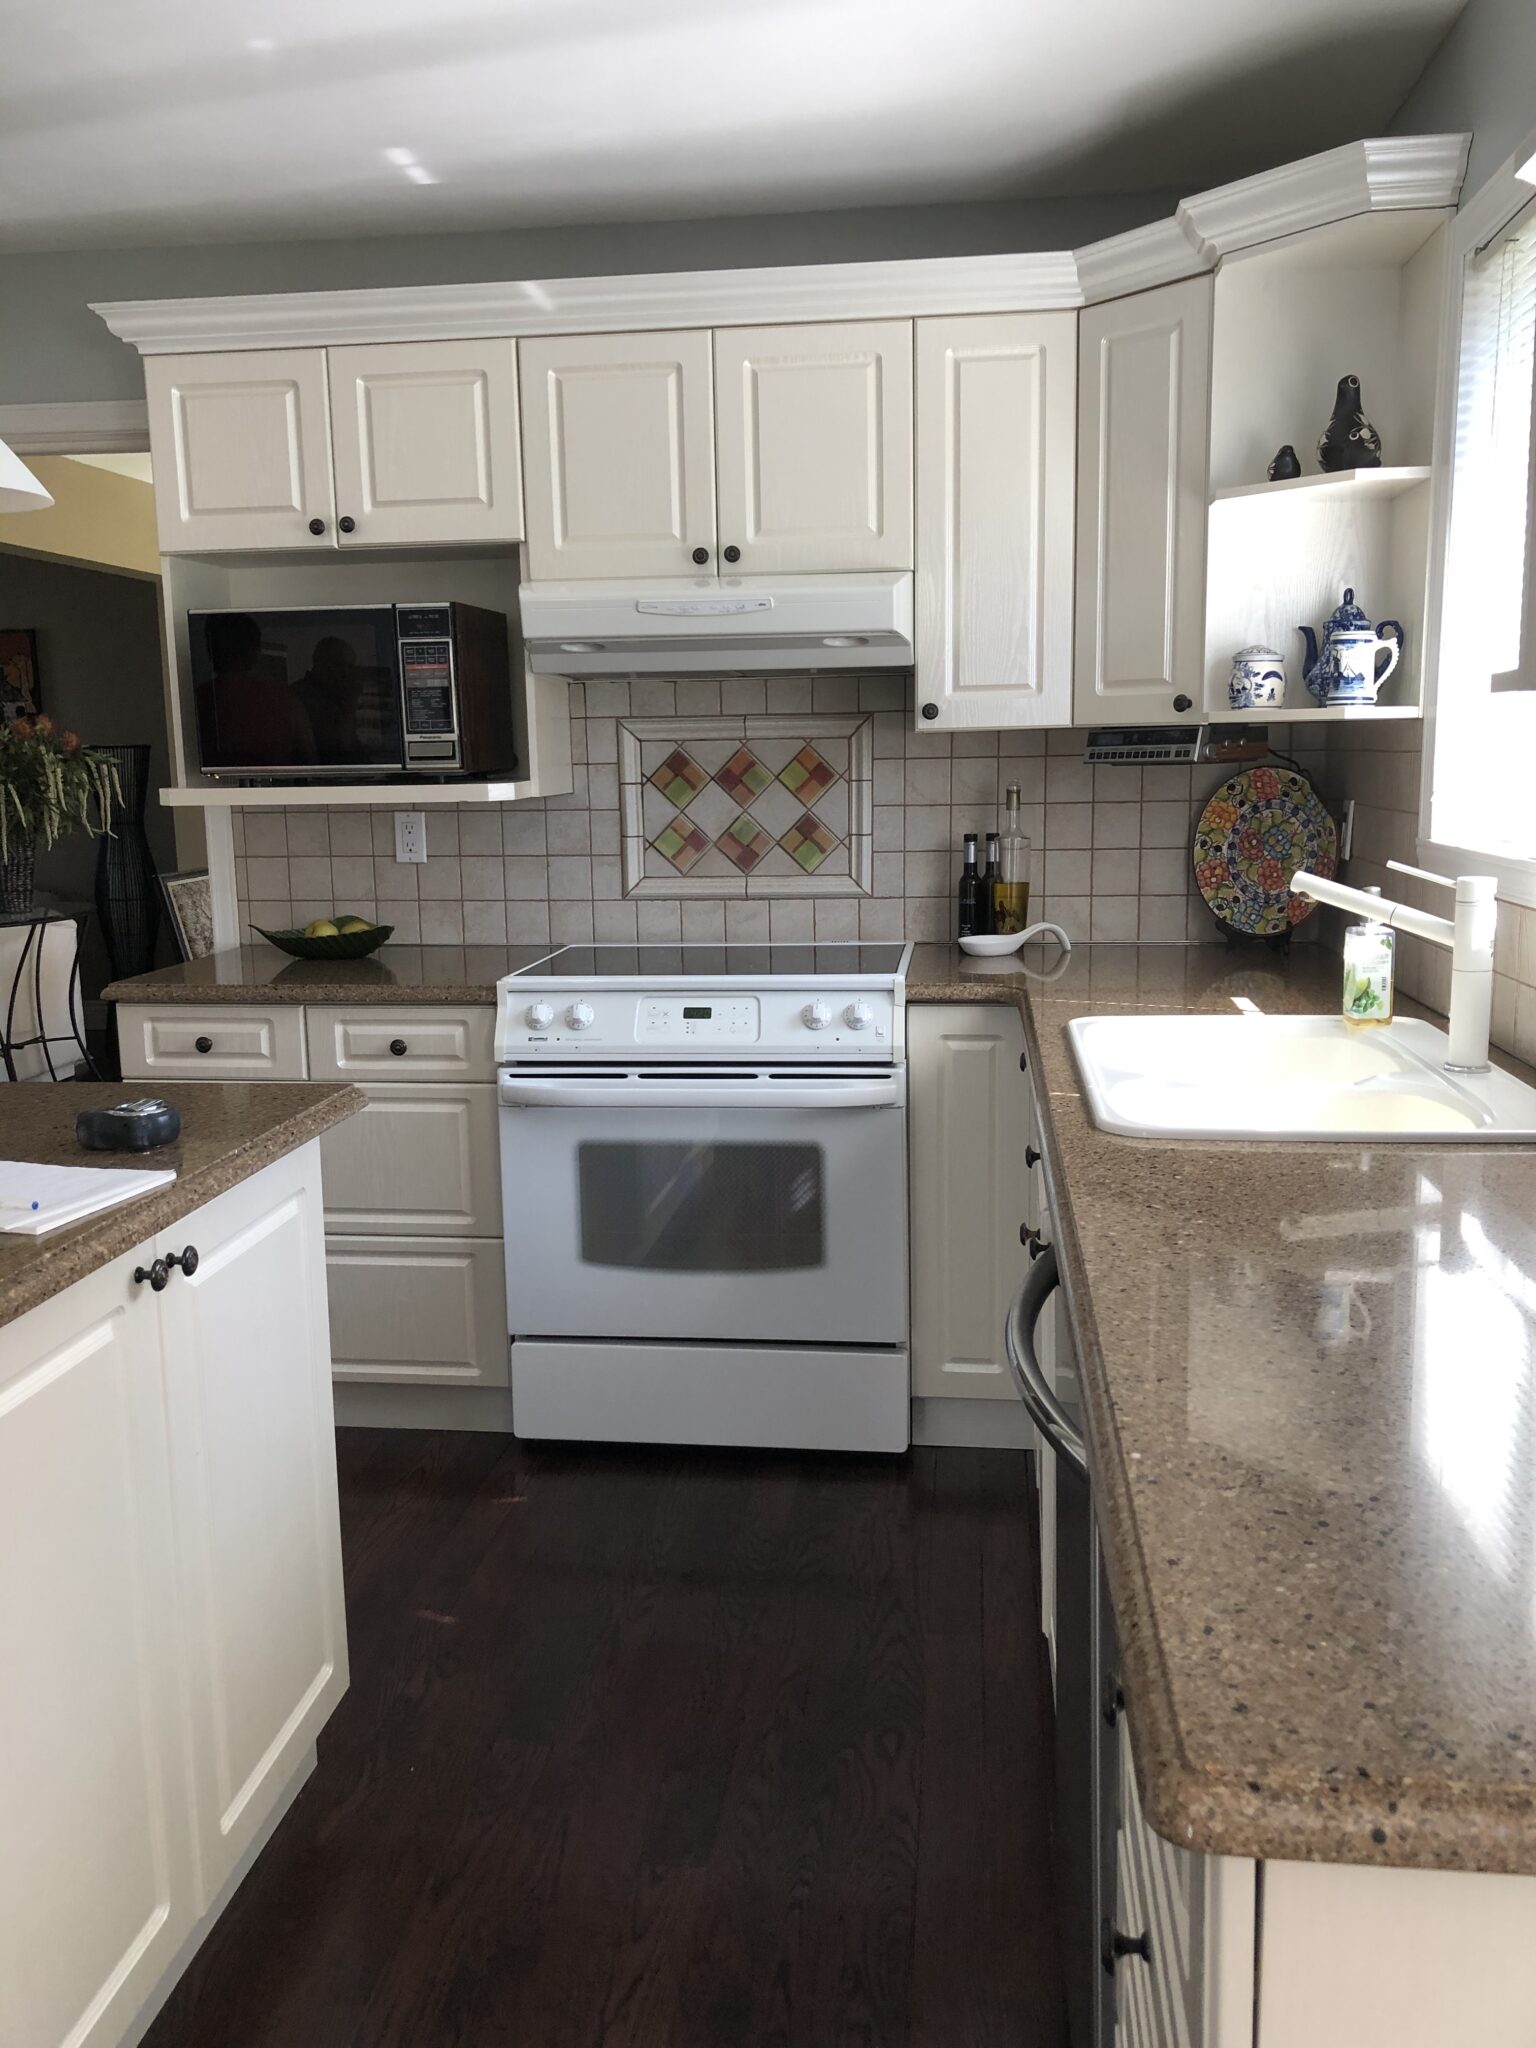
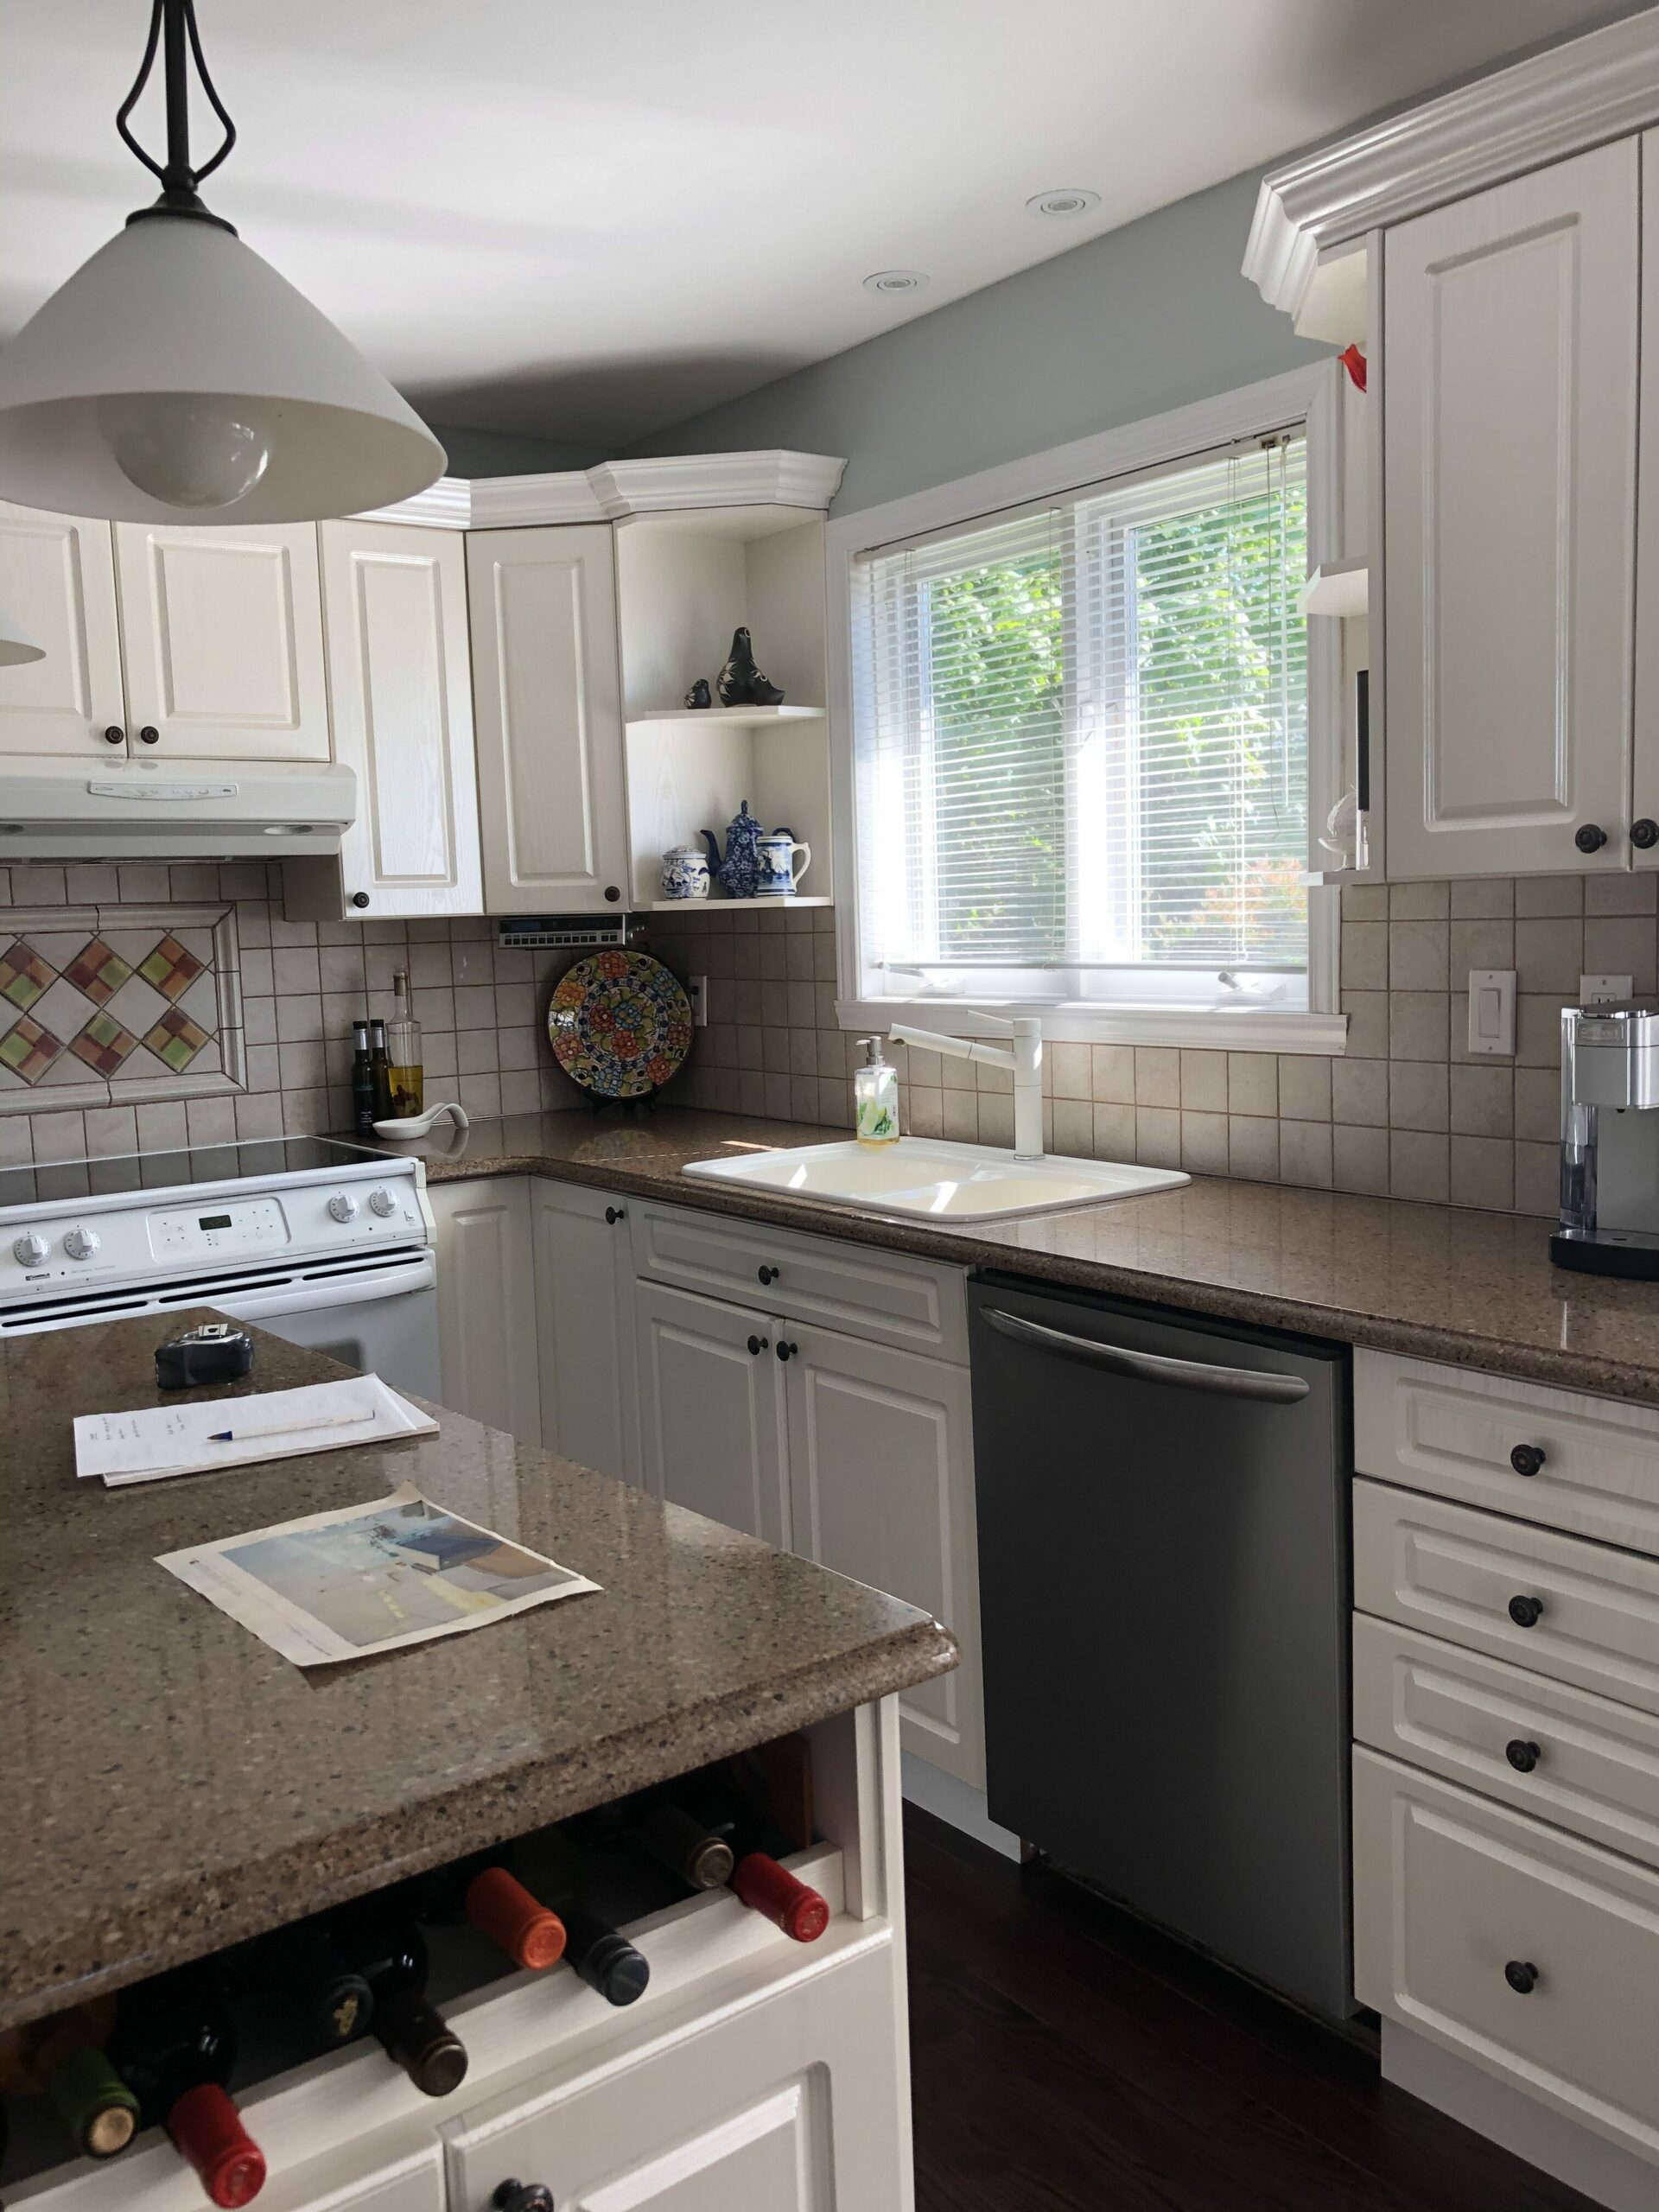
The original kitchen was in good shape, but it was small and dated. The clients love to cook and entertain, and found its size a bit limiting. What started as a kitchen renovation morphed into a much larger renovation, as we shifted the main floor spaces one room over. In all fairness, I didn’t know we’d end up doing that, but as the plan progressed and we explored all of the options and solutions for their needs, this was the design and layout that checked off all the boxes and won them over. They were excited to get started!
BEFORE
The family room stayed put, but the kitchen shifted to where the original dining room was, and the dining room shifted to where the original formal living room was. By re-arranging these rooms, we created an opportunity for a larger, more open kitchen, a perfect spot for a dinette area (where the old kitchen was) ,and a new dining room large enough to seat 10-12.
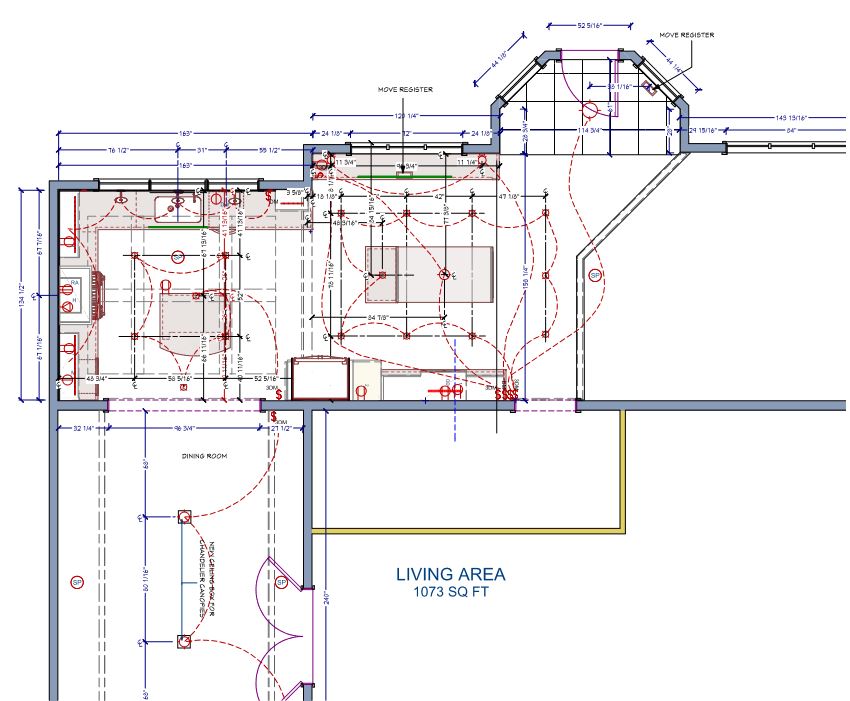
NEW FLOOR PLAN
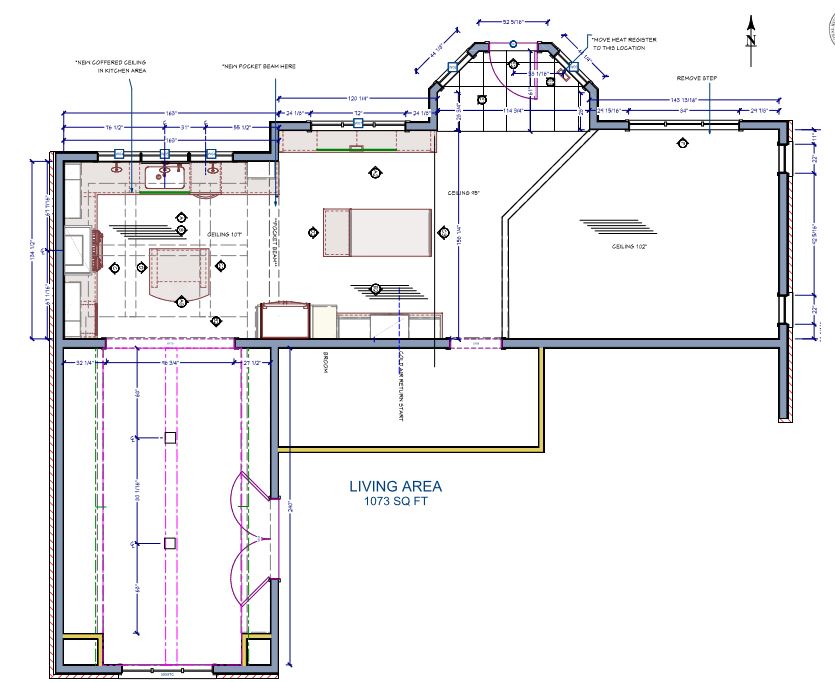
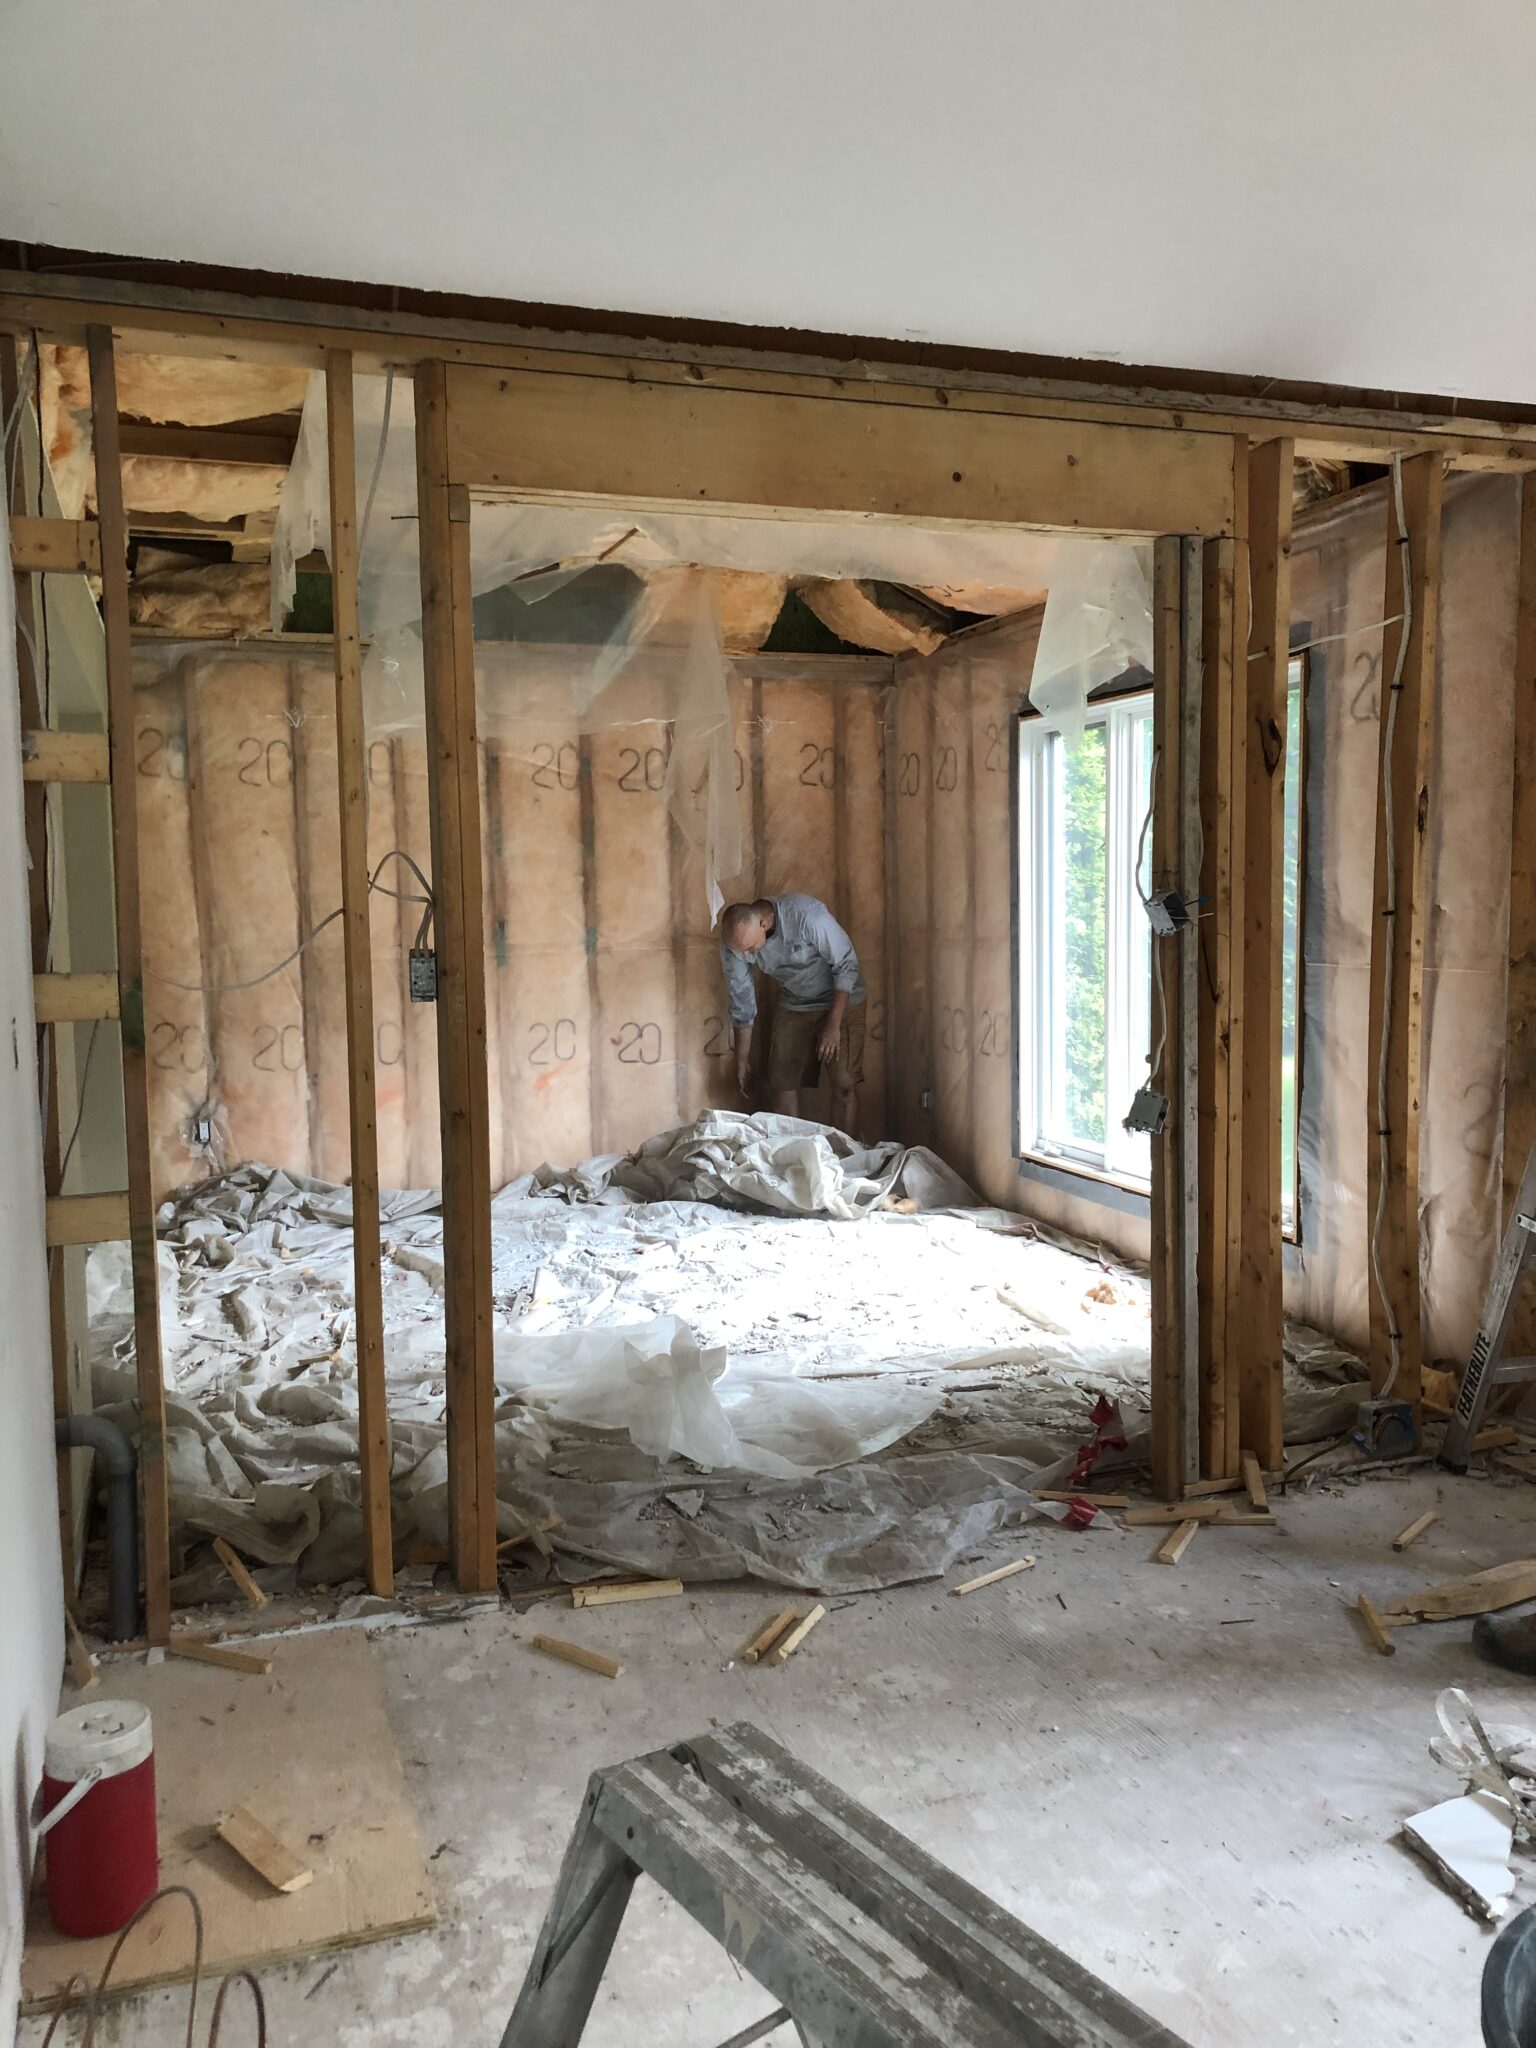
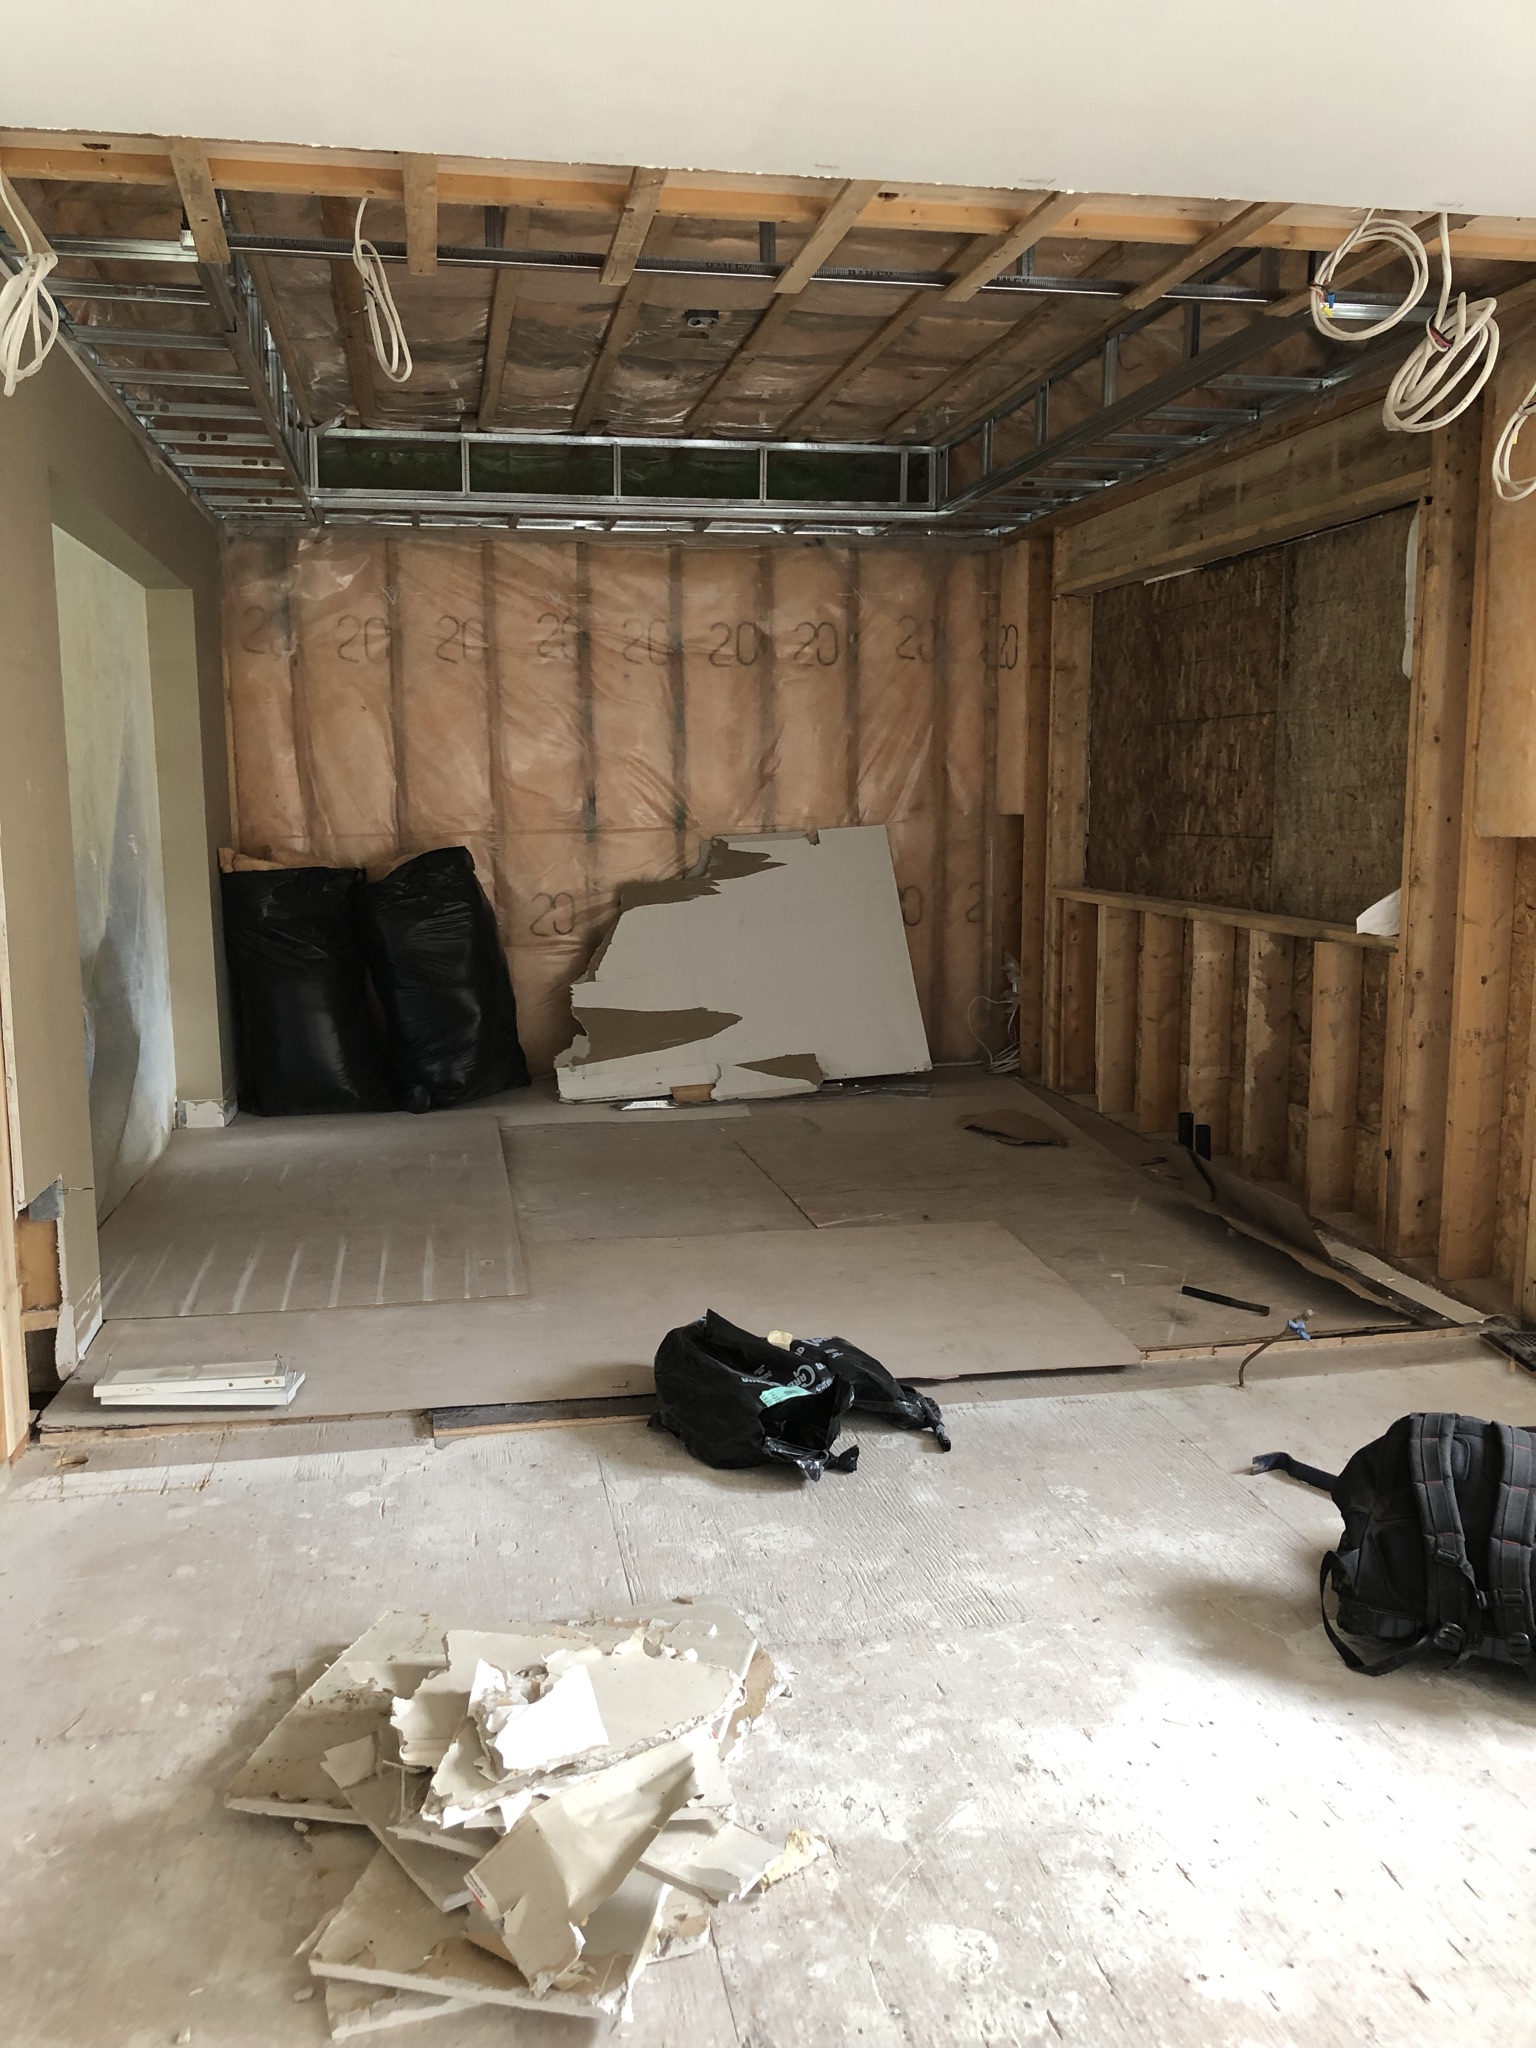
REMOVING A SUPPORTING WALL IN THE KITCHEN
While it’s easy to say let’s just take out that wall and open up the space, the wall between the kitchen and dining room was a supporting wall. While most people would just cut out an opening and call it a day, there’s no better indication that a renovation was done when you see that ceiling beam intact, still blocking your view.
My clients didn’t want to see the beam running across the two spaces and in their words; “What’s the point of opening up the space if it’s not really opened up”. Couldn’t agree more!
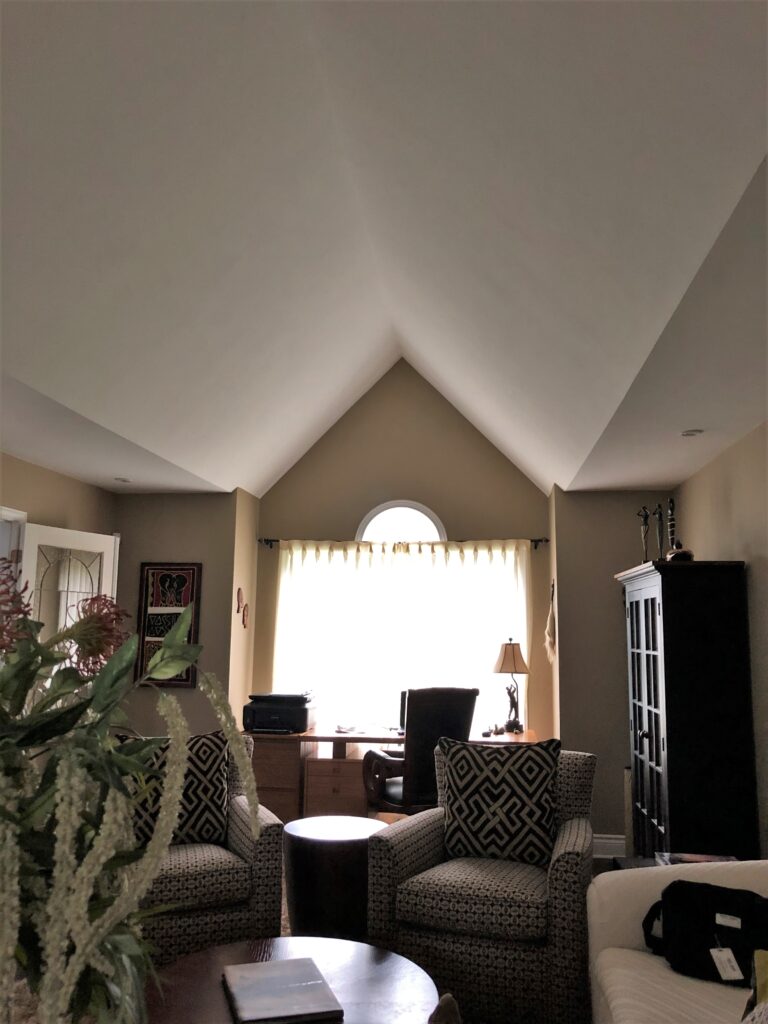
The challenge was that the dining room ceiling, a chateau-type ceiling detail, was higher than the kitchen ceiling, which was lower and flat.
BEFORE
We were all in agreement that it had to be a clear ceiling plane, so we specified a pocket beam to take care of structural loads. This is a beam that goes above the wall into the ceiling. Yes, it’s a bit more expensive, but it is so worth it.
You can see in the image below the old wall partition between the old kitchen and dining room. The 2nd image shows the pocket beam in place and the framing for a new coffered ceiling – more on that below.
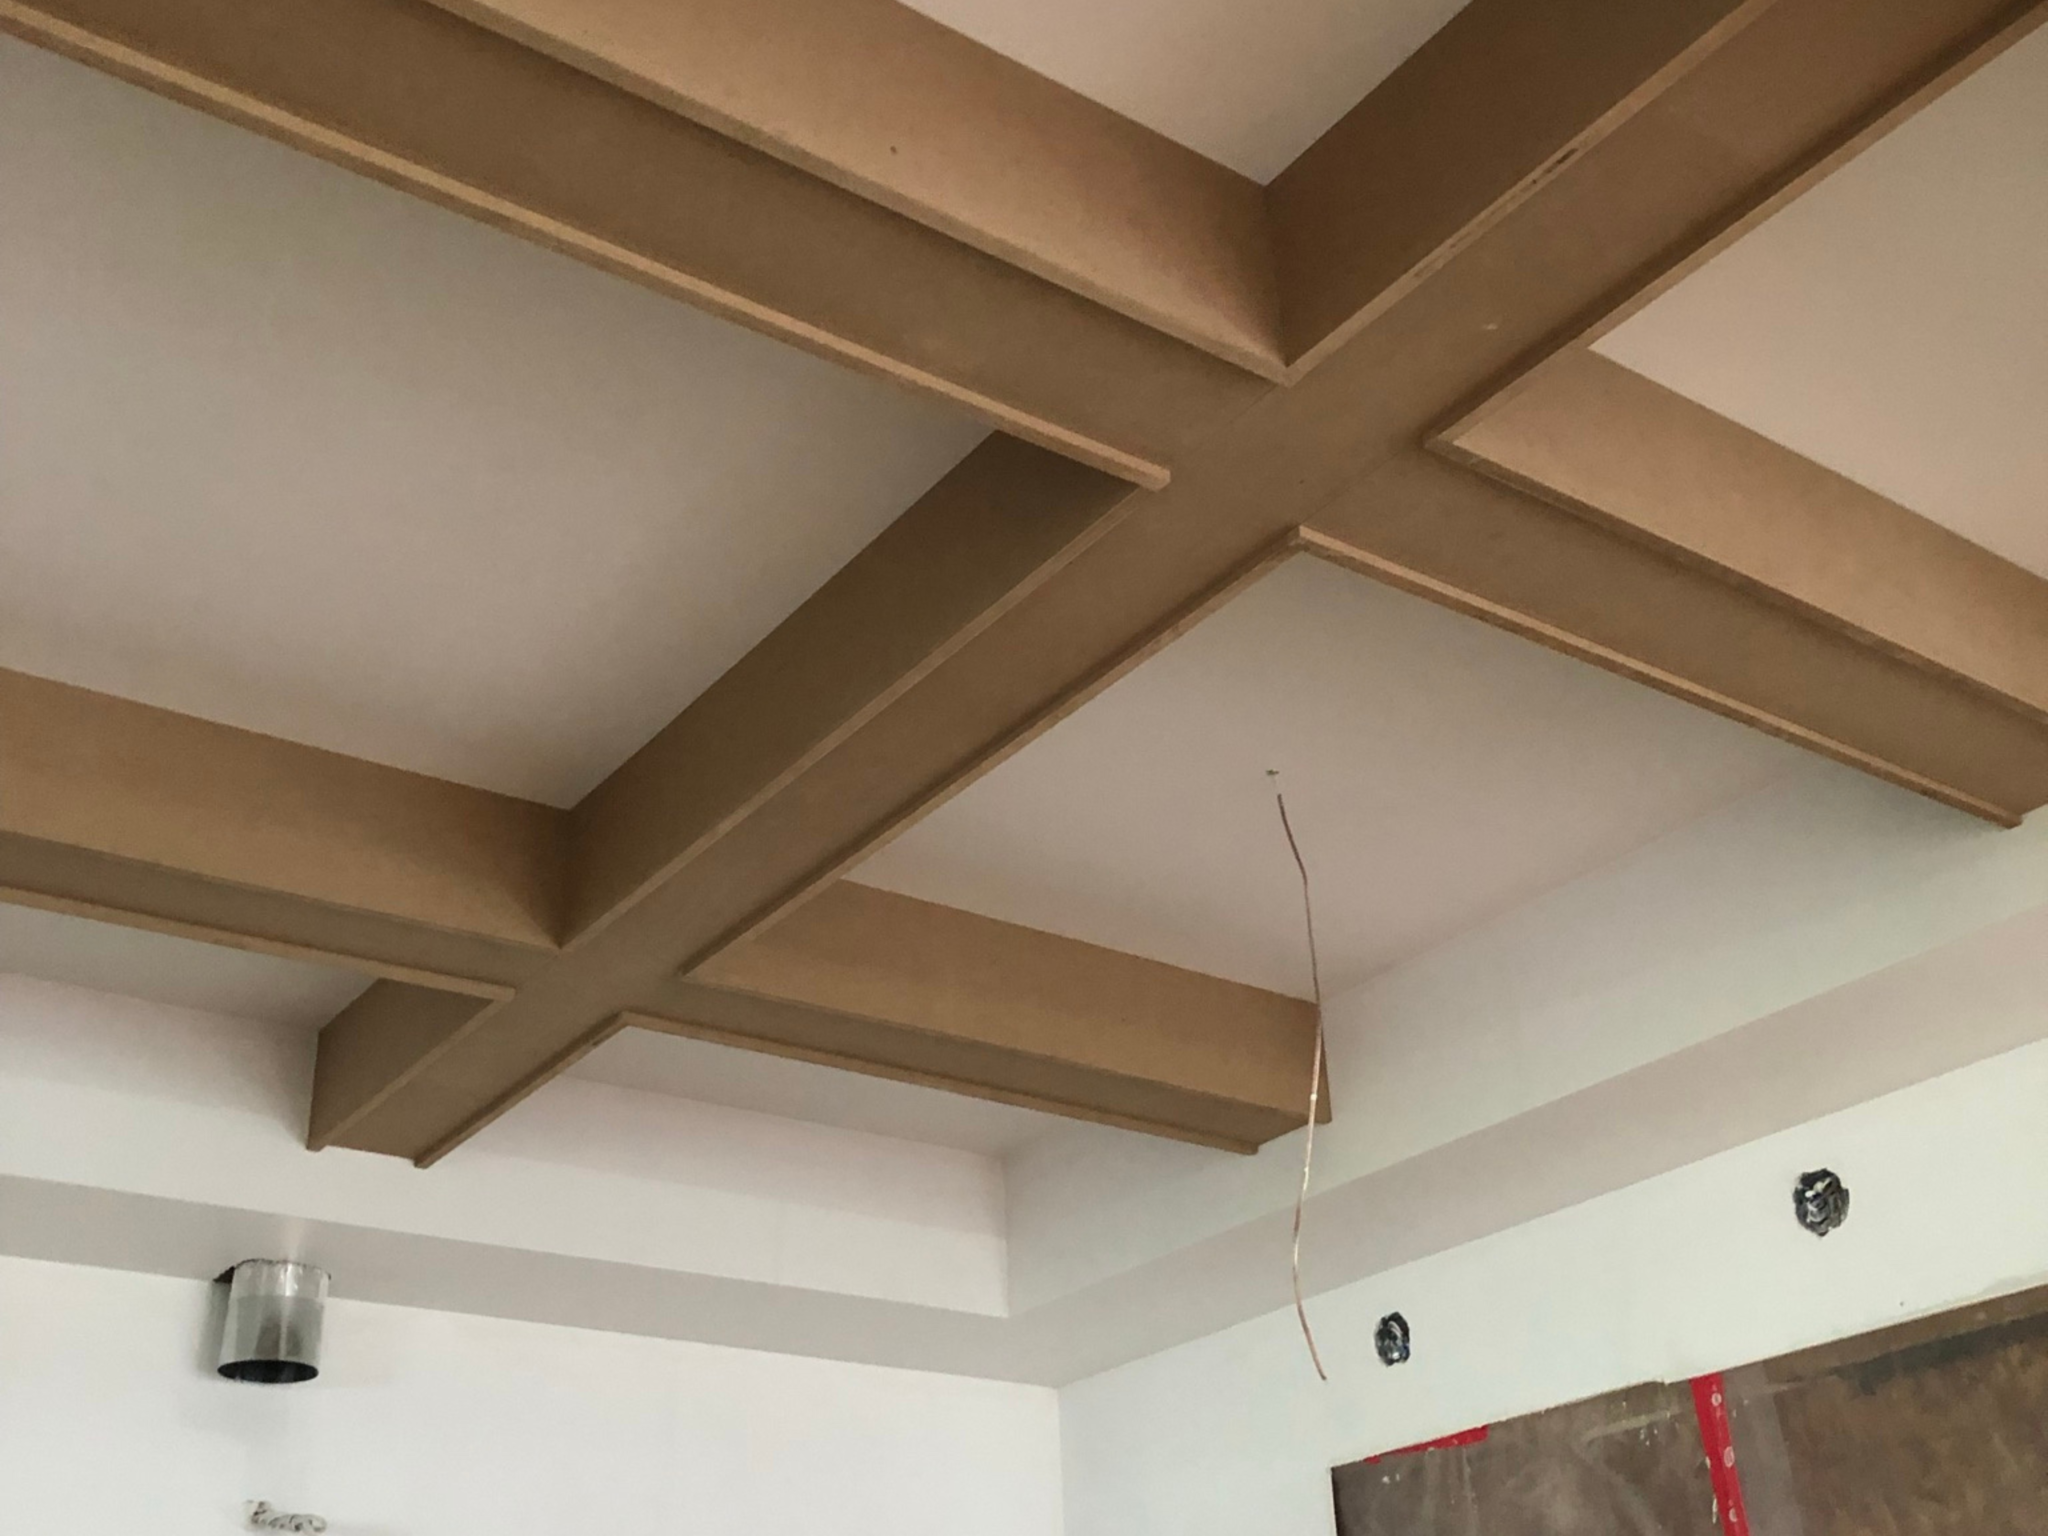
KITCHEN COFFERED CEILING DETAIL
Since the ‘old’ dining room was going to become the new kitchen, I needed a ceiling plan that would solve 2 issues;
1 – meet up with the low ceiling in the old kitchen space and
2 – create another ceiling plane for the wall cabinets to go to the ceiling while eliminating the dreaded bulkhead ‘look’.
The solution I came up with is this coffered ceiling and crown moulding detail, a traditional design style my clients already loved. The beams also offer areas to add task and decorative lighting over the new island. I think it turned out beautifully!
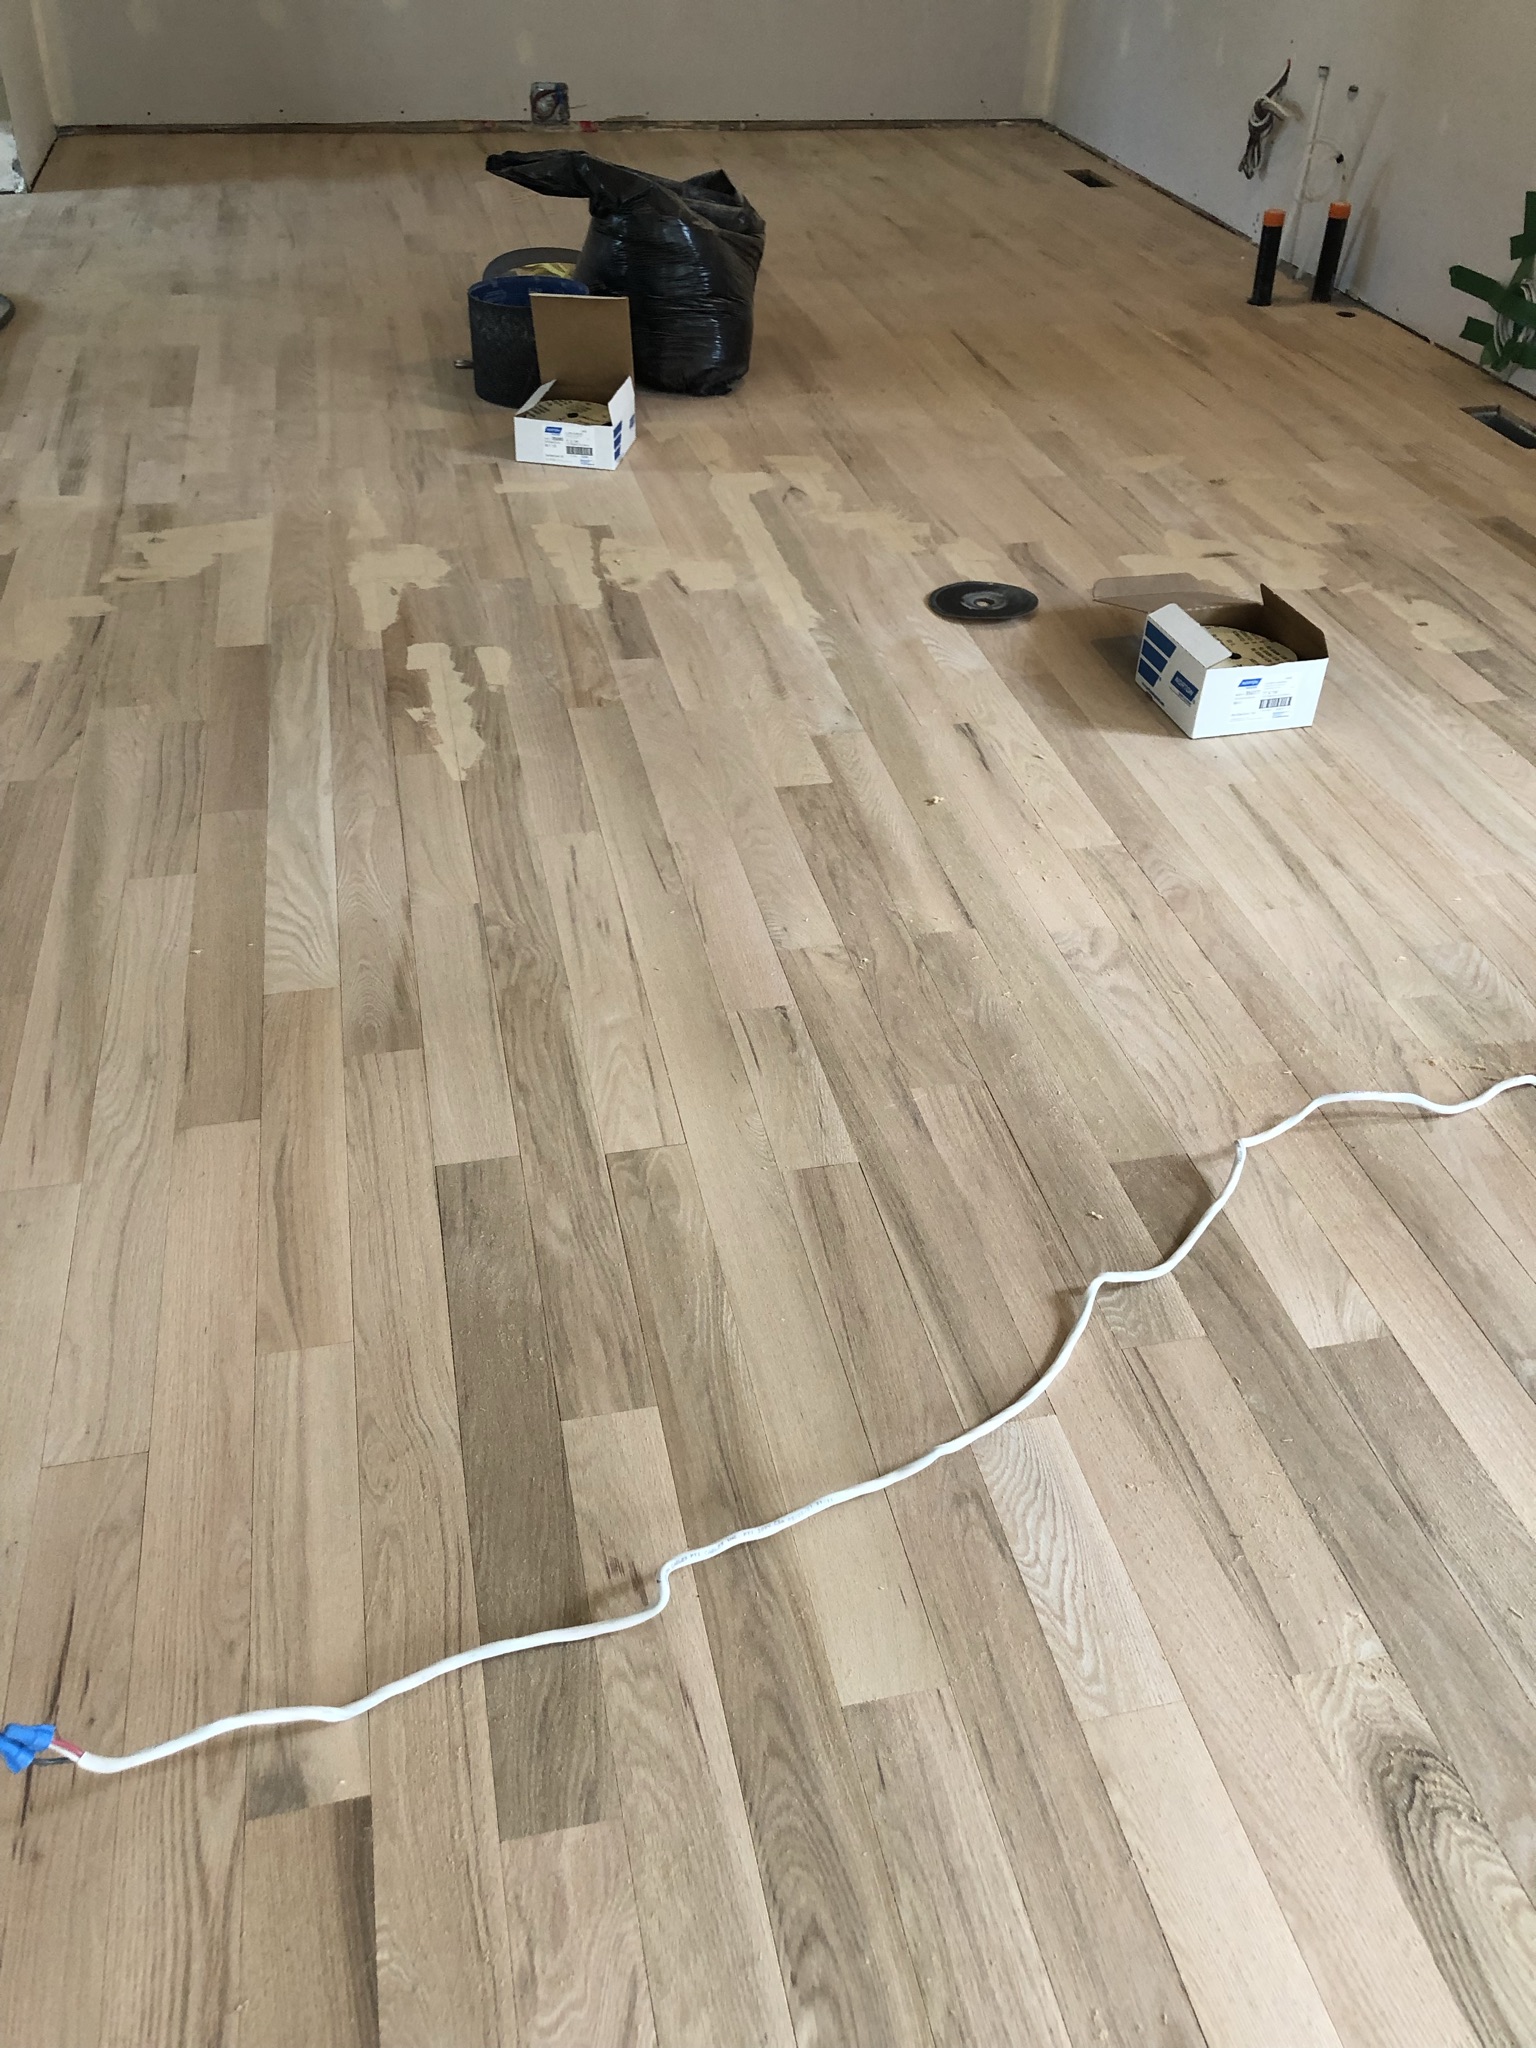
WOOD FLOORS IN KITCHENS
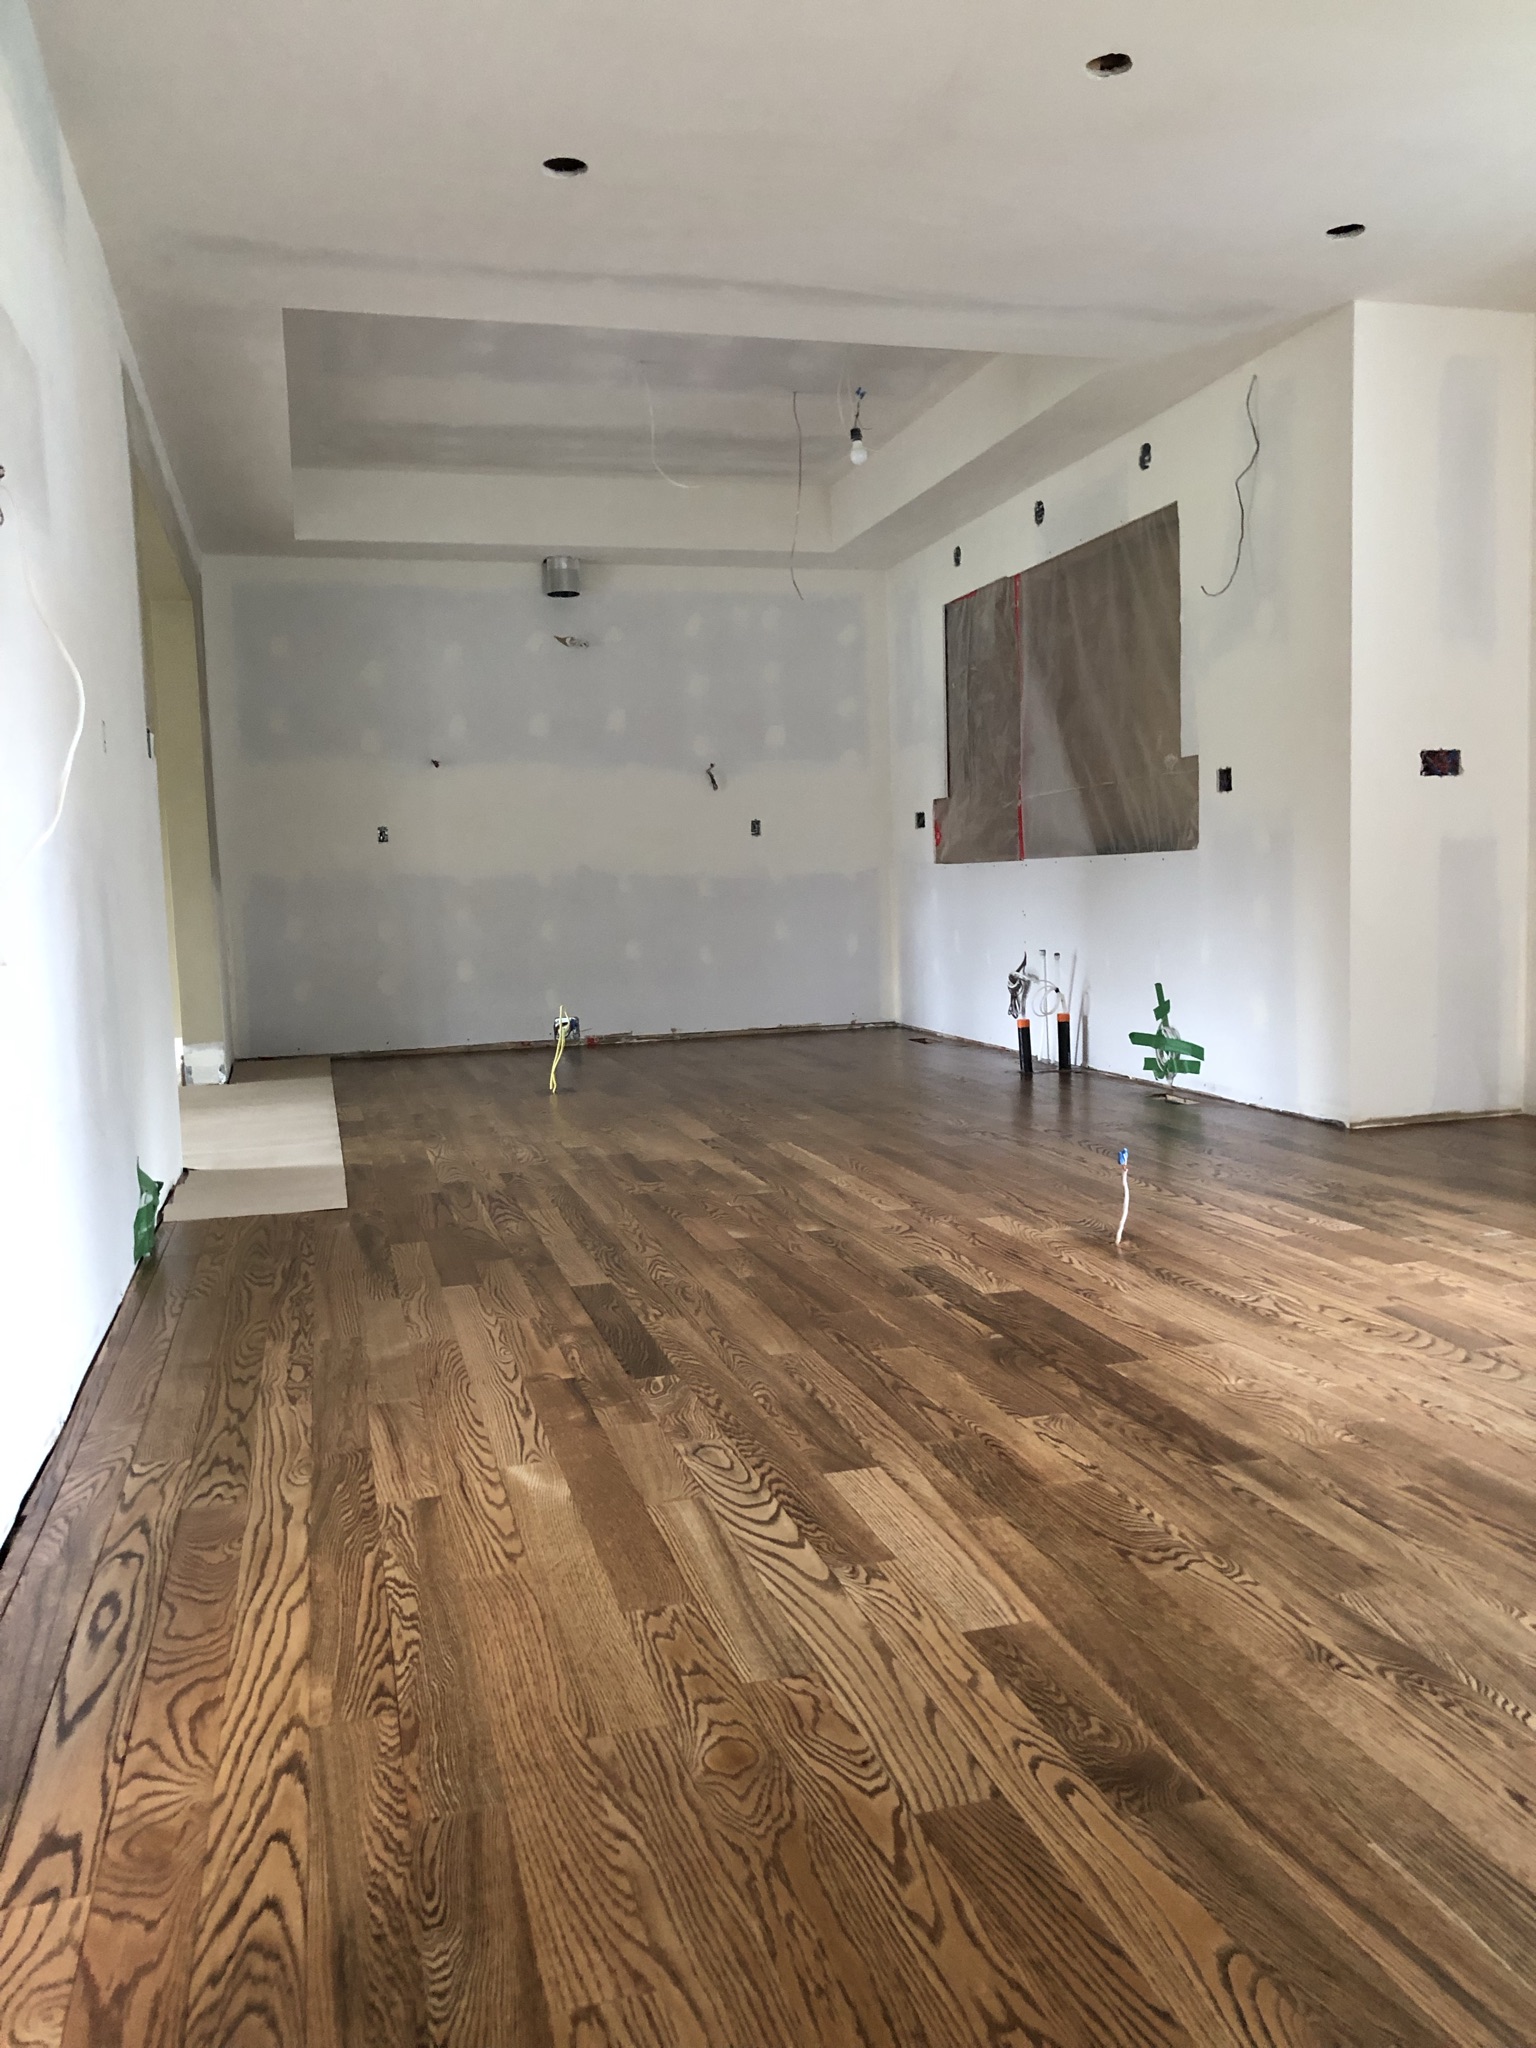
With the structural issues taken care of, I turned my attention to the flooring. The ‘old’ kitchen had a tile floor, but with the rooms opened up to each other, it would look weird to have tile breaking up these rooms.
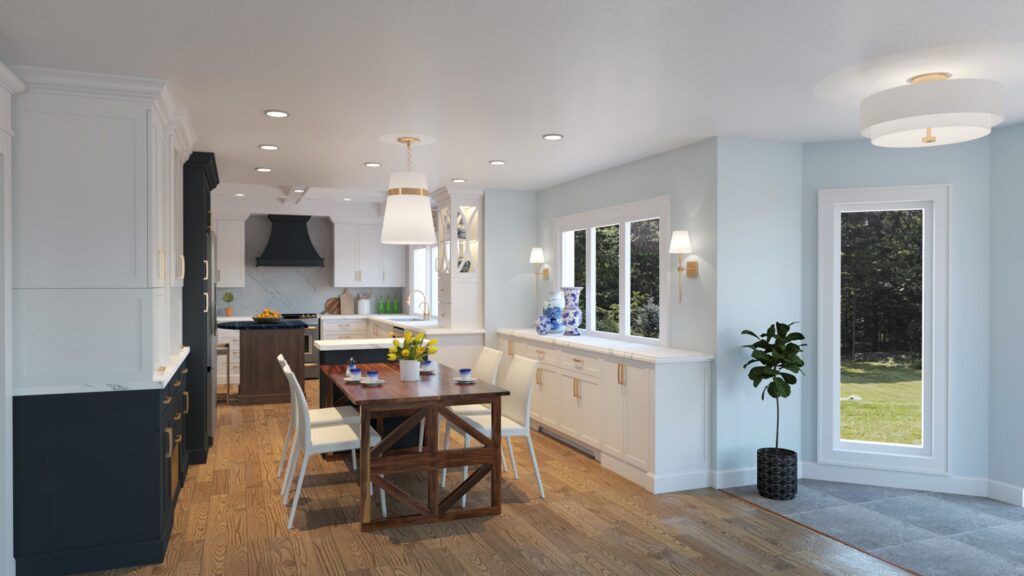
The home already had gorgeous oak floors throughout, albeit dark, and since the other 2 rooms’ flooring wasn’t going to be affected, we decided to weave in new oak planks for the new dinette area. This keeps visual continuity throughout the new open spaces. Once the new planks were in, all of the main level floors were sanded, and a new medium stain was applied to bring out the natural character of the wood.
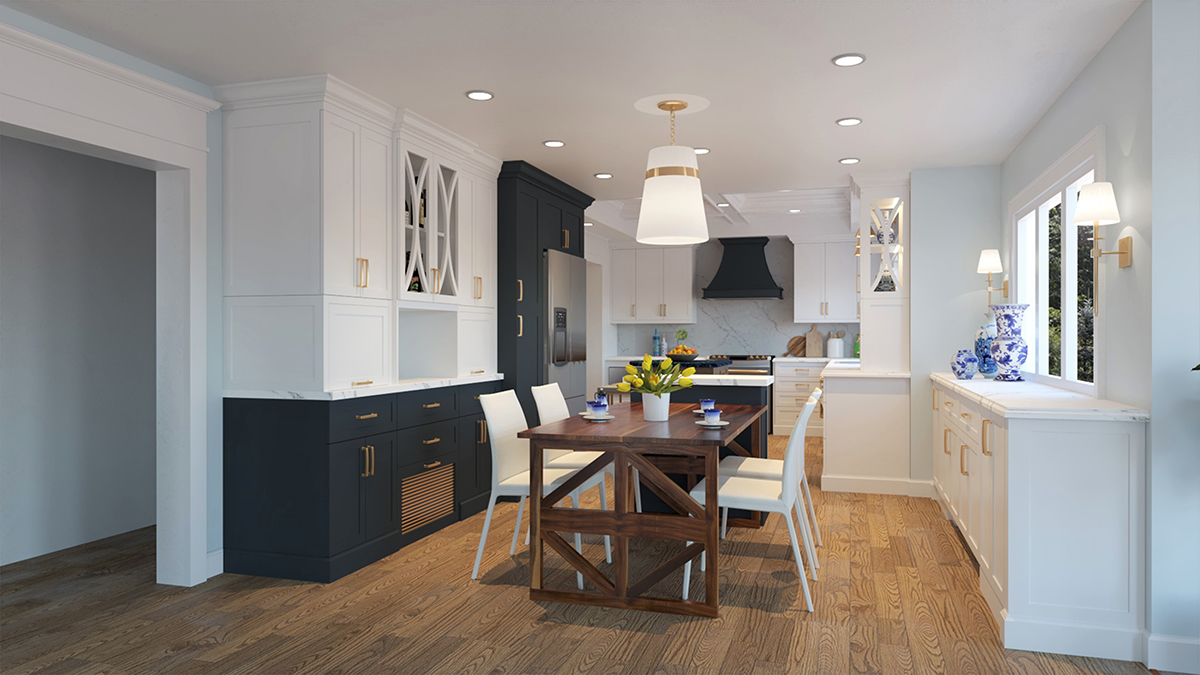
NEW KITCHEN LAYOUT
We explored 4 different layout options for the new kitchen space, and this is the one that made the most sense for the clients. It had enough countertop space for prepping food and everyday tasks as well as for entertaining. There was definitely a lot more storage with the 2 built-in sideboards in the dinette area to handle the overflow. The island was the last piece of the puzzle to be included in this plan, and I just managed to squeeze it in with a counter overhang to accommodate 2 stools. It’s perfect as it grounds the kitchen and creates a visual barrier between the new dining room and the kitchen.
AFTER
KITCHEN DINETTE AREA PLAN
Boy, did we pack a lot of punch in this dinette space! The left wall in the space has built-in cabinetry to house cocktailware in the upper cabinets, and the bottom cabinets have in-drawer chargers for media devices. The challenge on this wall was the cold air return that needed to be accessible both for actual air movement and for servicing. I designed a mesh front for the center base cabinet, and it perfectly camouflages the situation while adding a traditional, elegant element to this wall of cabinets.
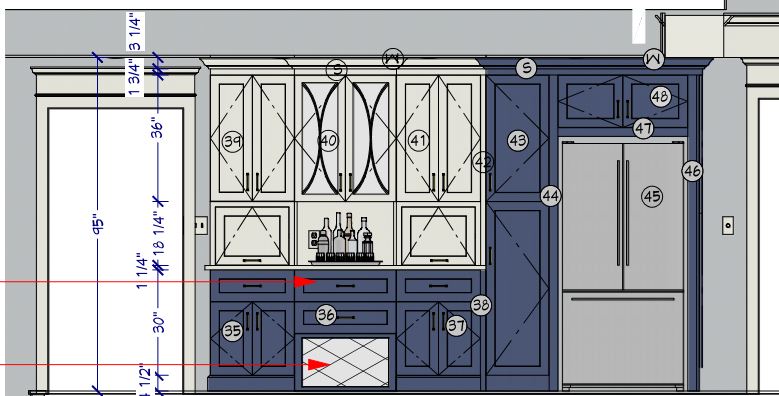
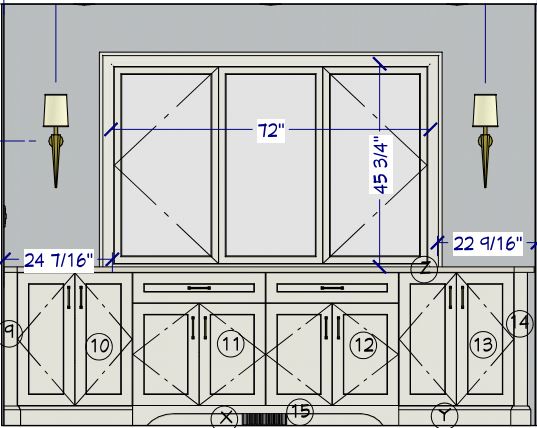
The opposite wall has shallower built-in cabinets under the window. Again, this is a great space for buffet serving when entertaining larger parties, and holds entertaining accessories.
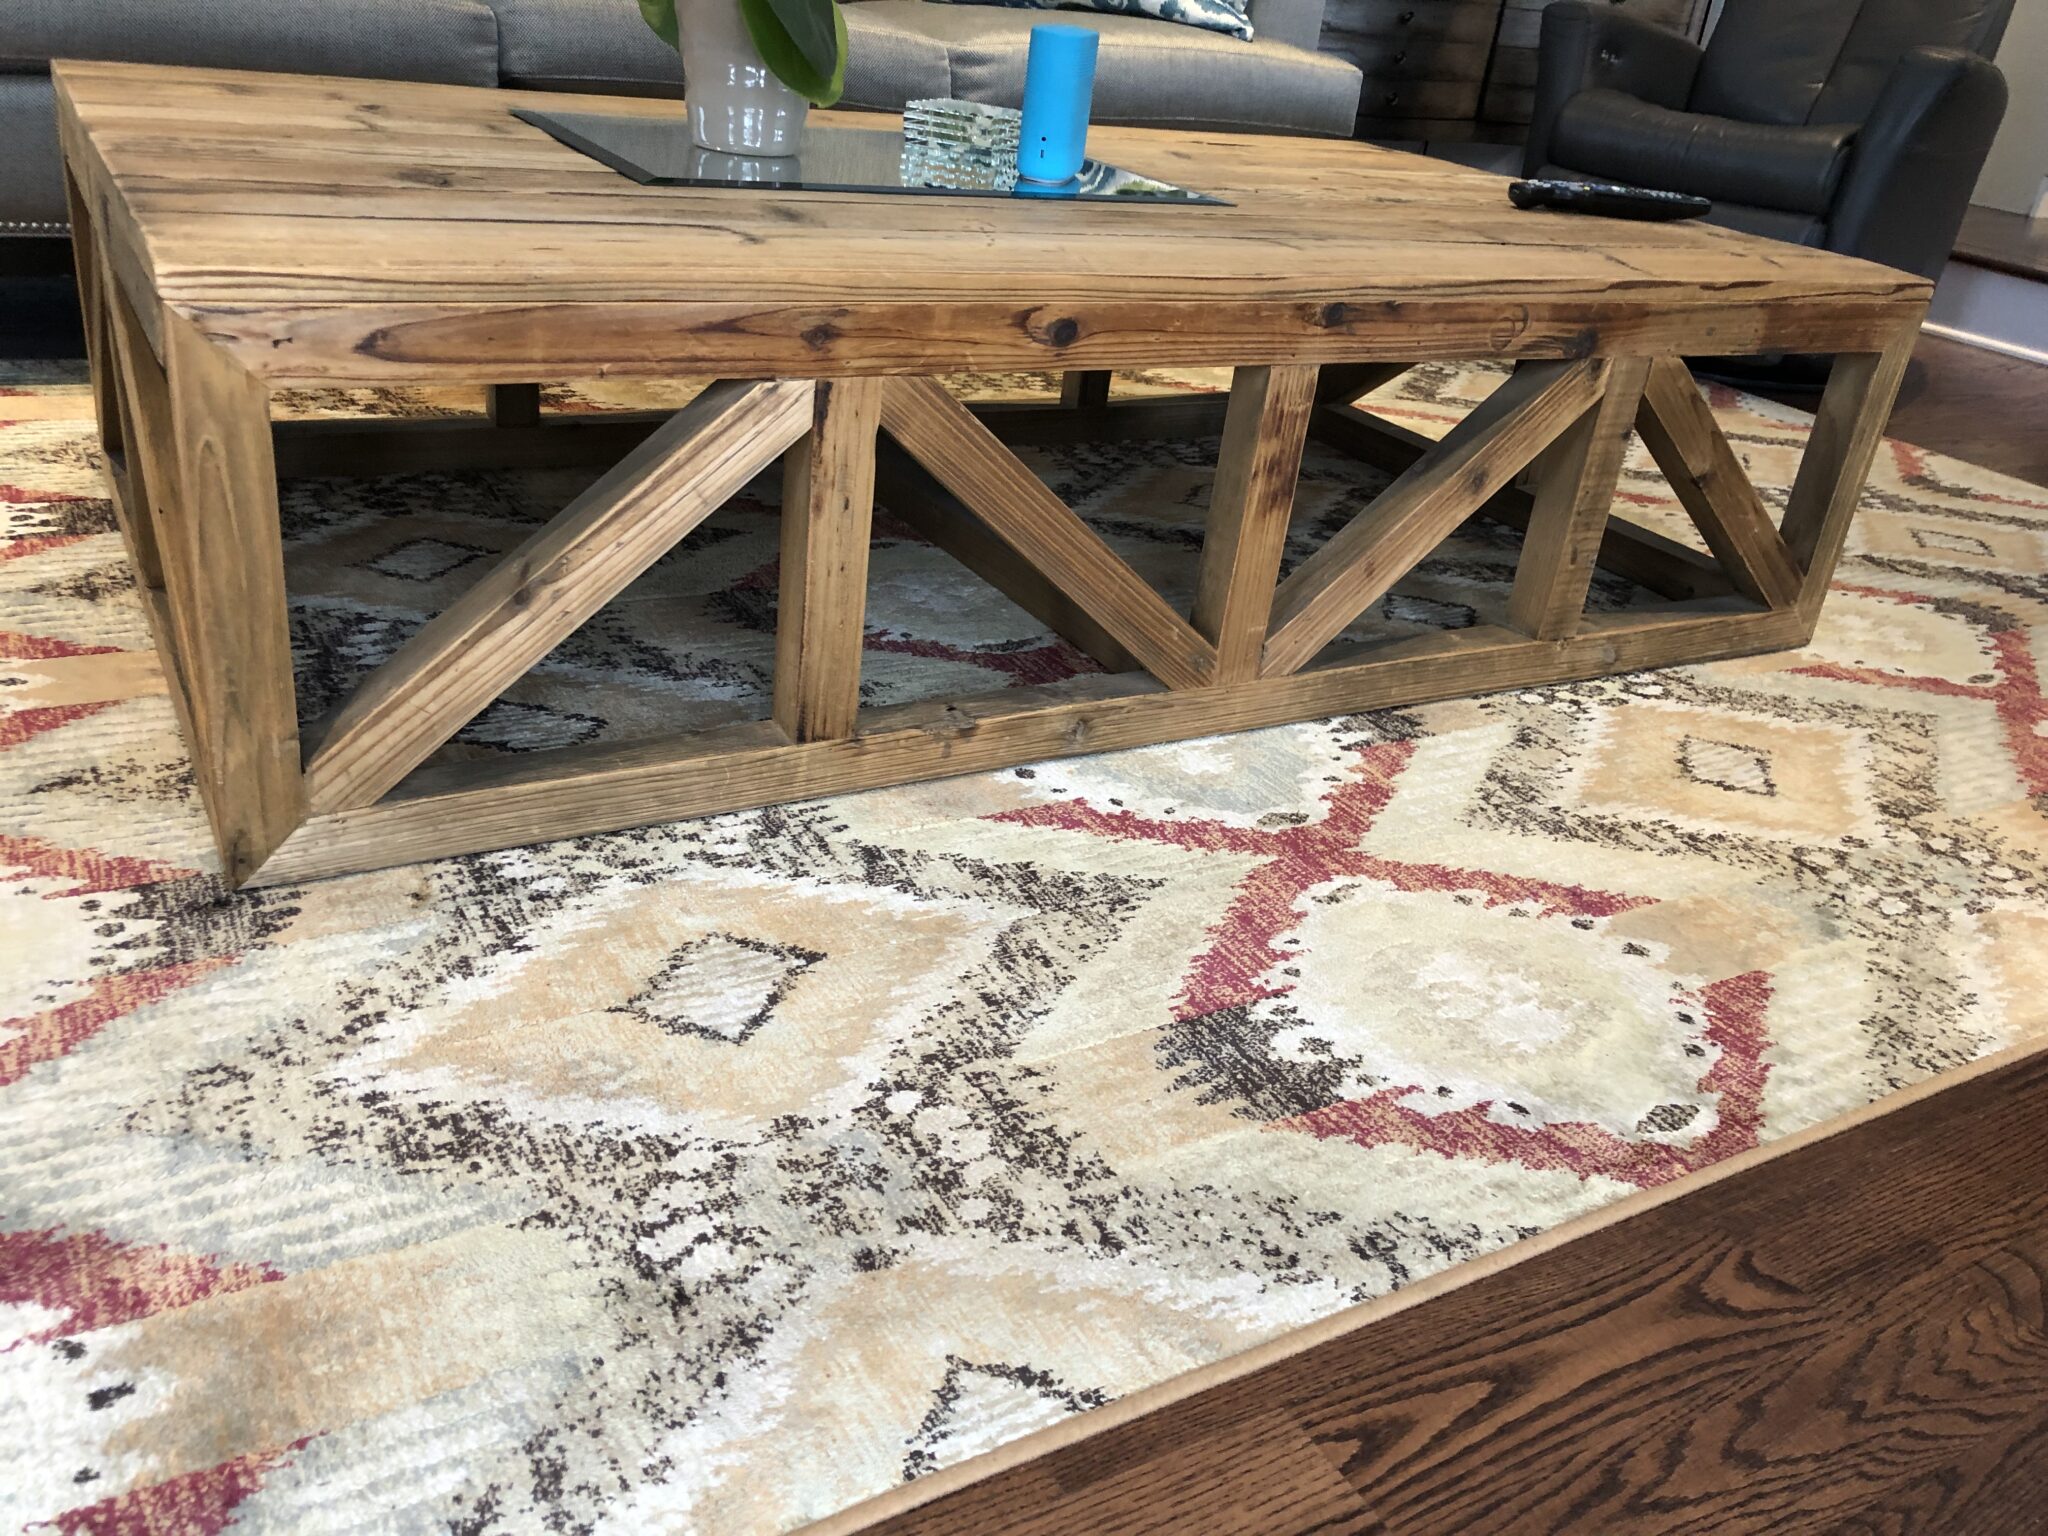
The dinette table was serendipitous since it had another life as a coffee table in the family room. The client loved her rustic coffee table, but it was not a favourite of the Mr. It was too good to just give away, and after investigating its construction, I suggested that we could probably reconfigure it into the dinette table….aaannd voila! We matched the stain on the dinette table and the island to relate the two wood elements in the kitchen.

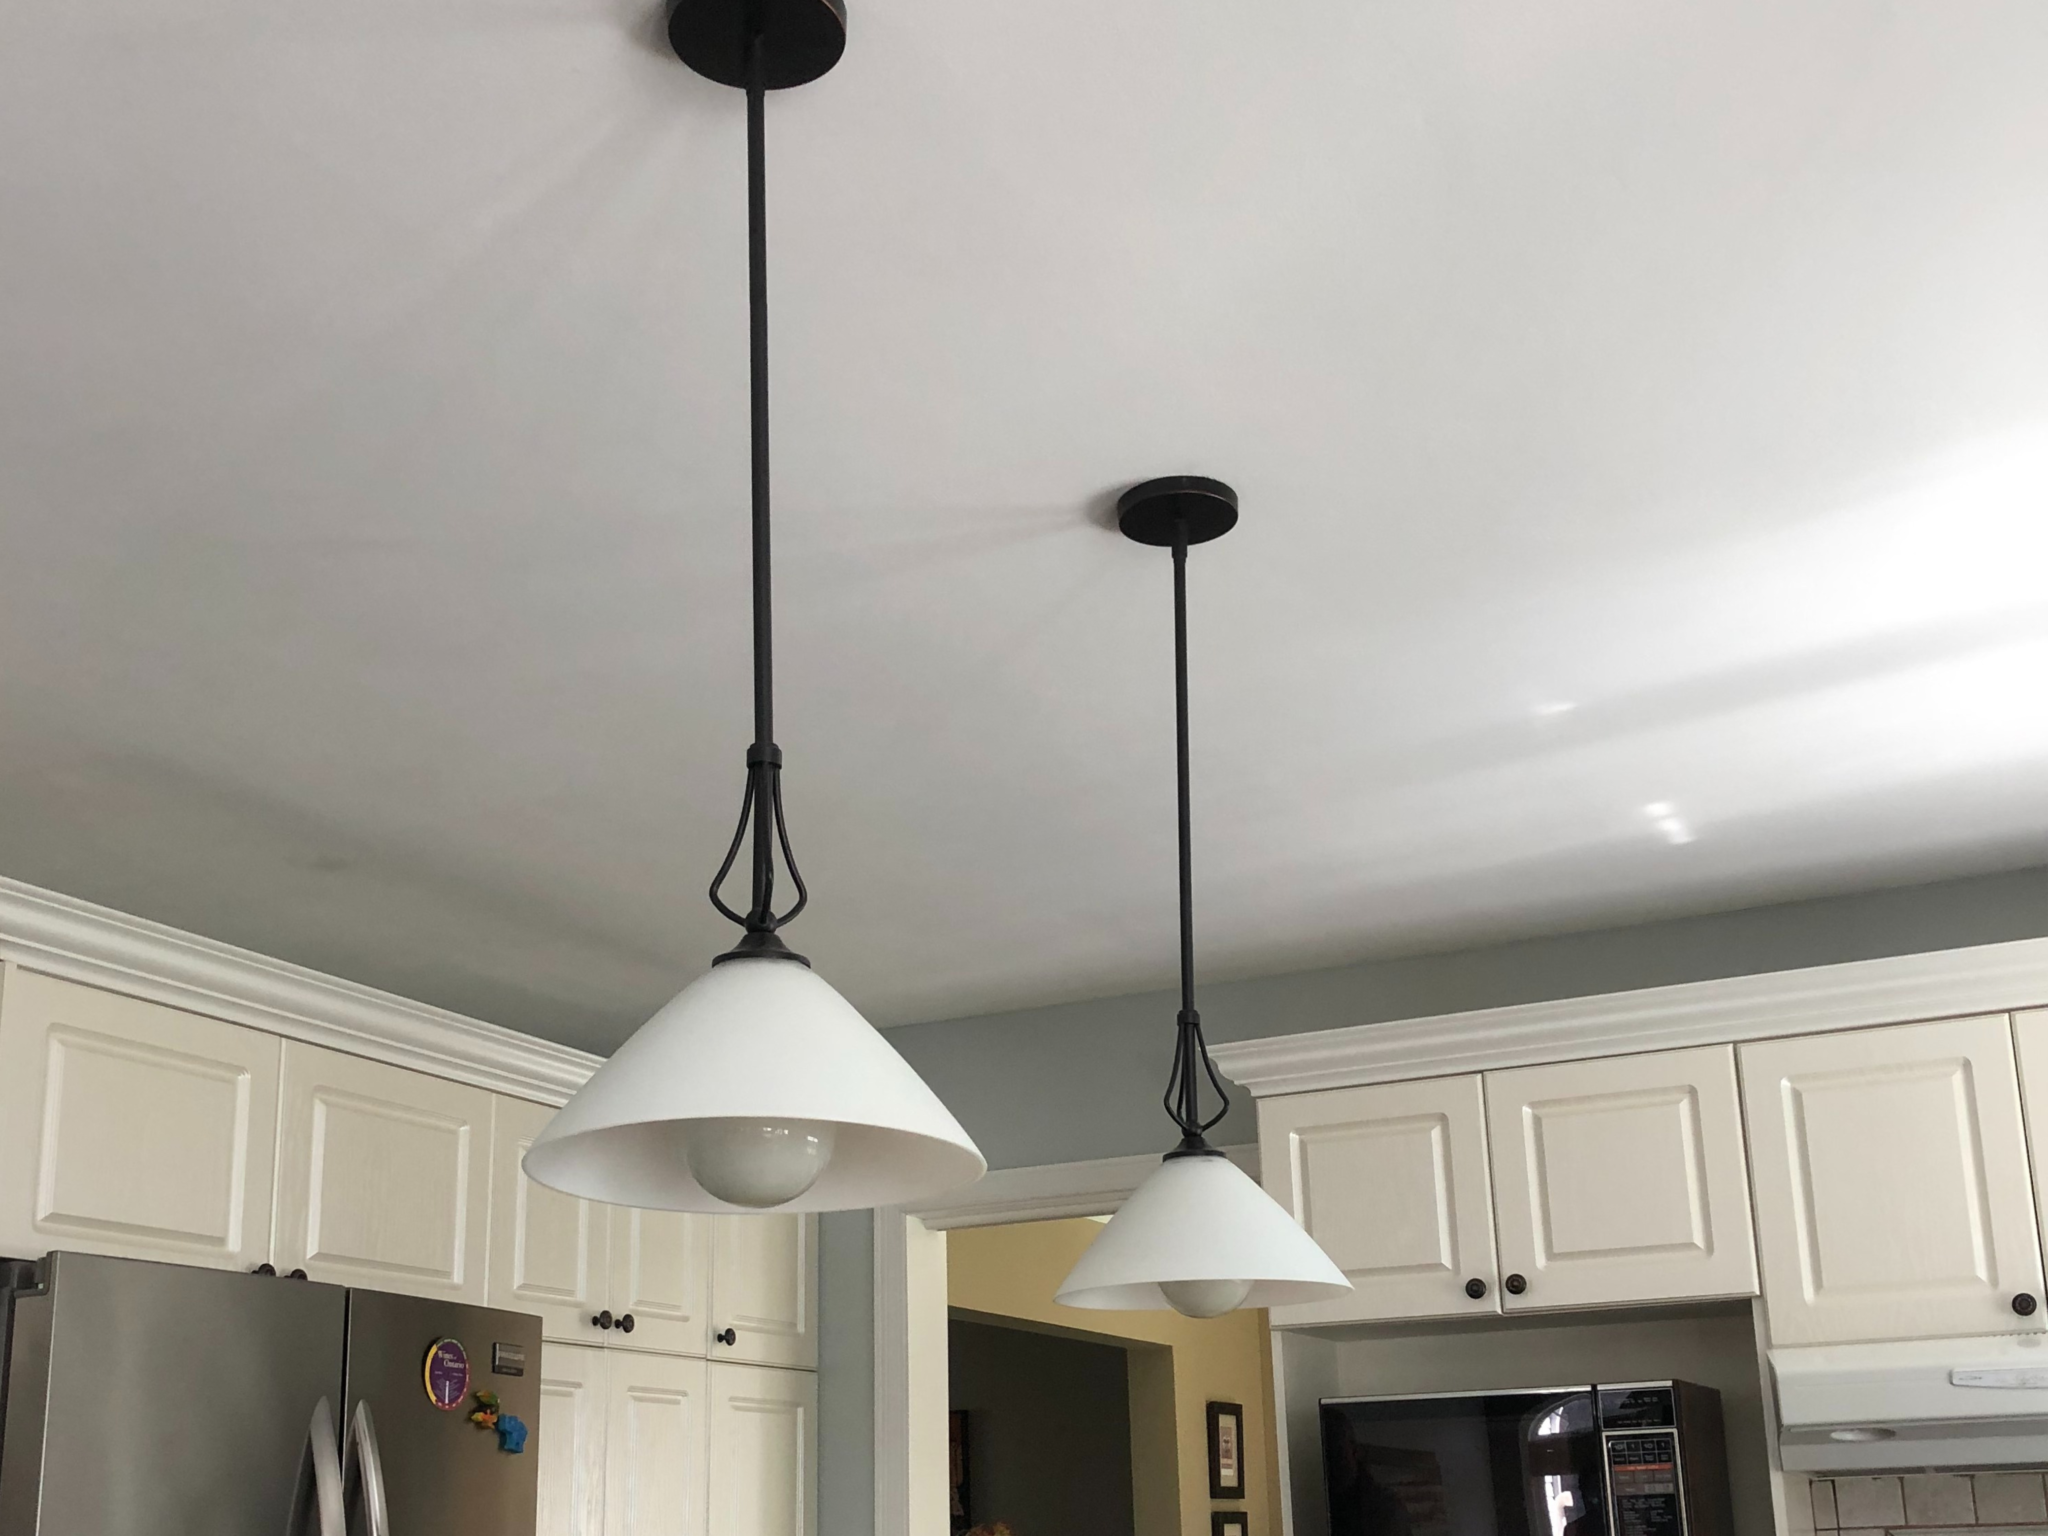
KITCHEN LIGHTING REQUIREMENTS
The lighting plan for this project was comprehensive to say the least, and it was quite the upgrade to this home. Without doing a full gut renovation, it would have been difficult to achieve this level of layered lighting.
We included task lighting under the cabinets where you need it when prepping, we added pot lights for general overhead lighting, and pretty decorative fixtures for ambiance lighting. All fixtures are on dimmers to create the perfect lighting scene for day or night.
Learn more about home lighting design here.
LAYERED LIGHTING FOR THE PERFECT SCENE
Pot lights, decorative wall sconces, under-cabinet lights, and interior cabinet lighting. You can just peek the dinette wall sconce on the right.
Lighting can make or break a space, and without having an understanding of the science of lighting, you might think you have the most beautiful space, but it can fall flat pretty quickly without the right guidance.
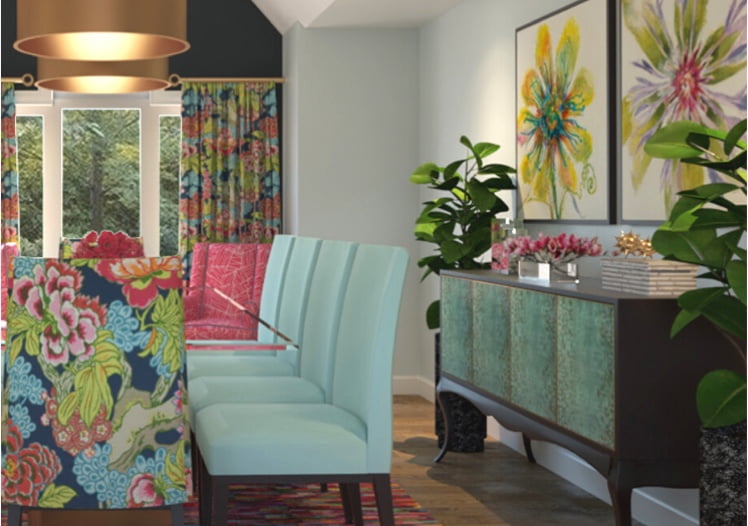
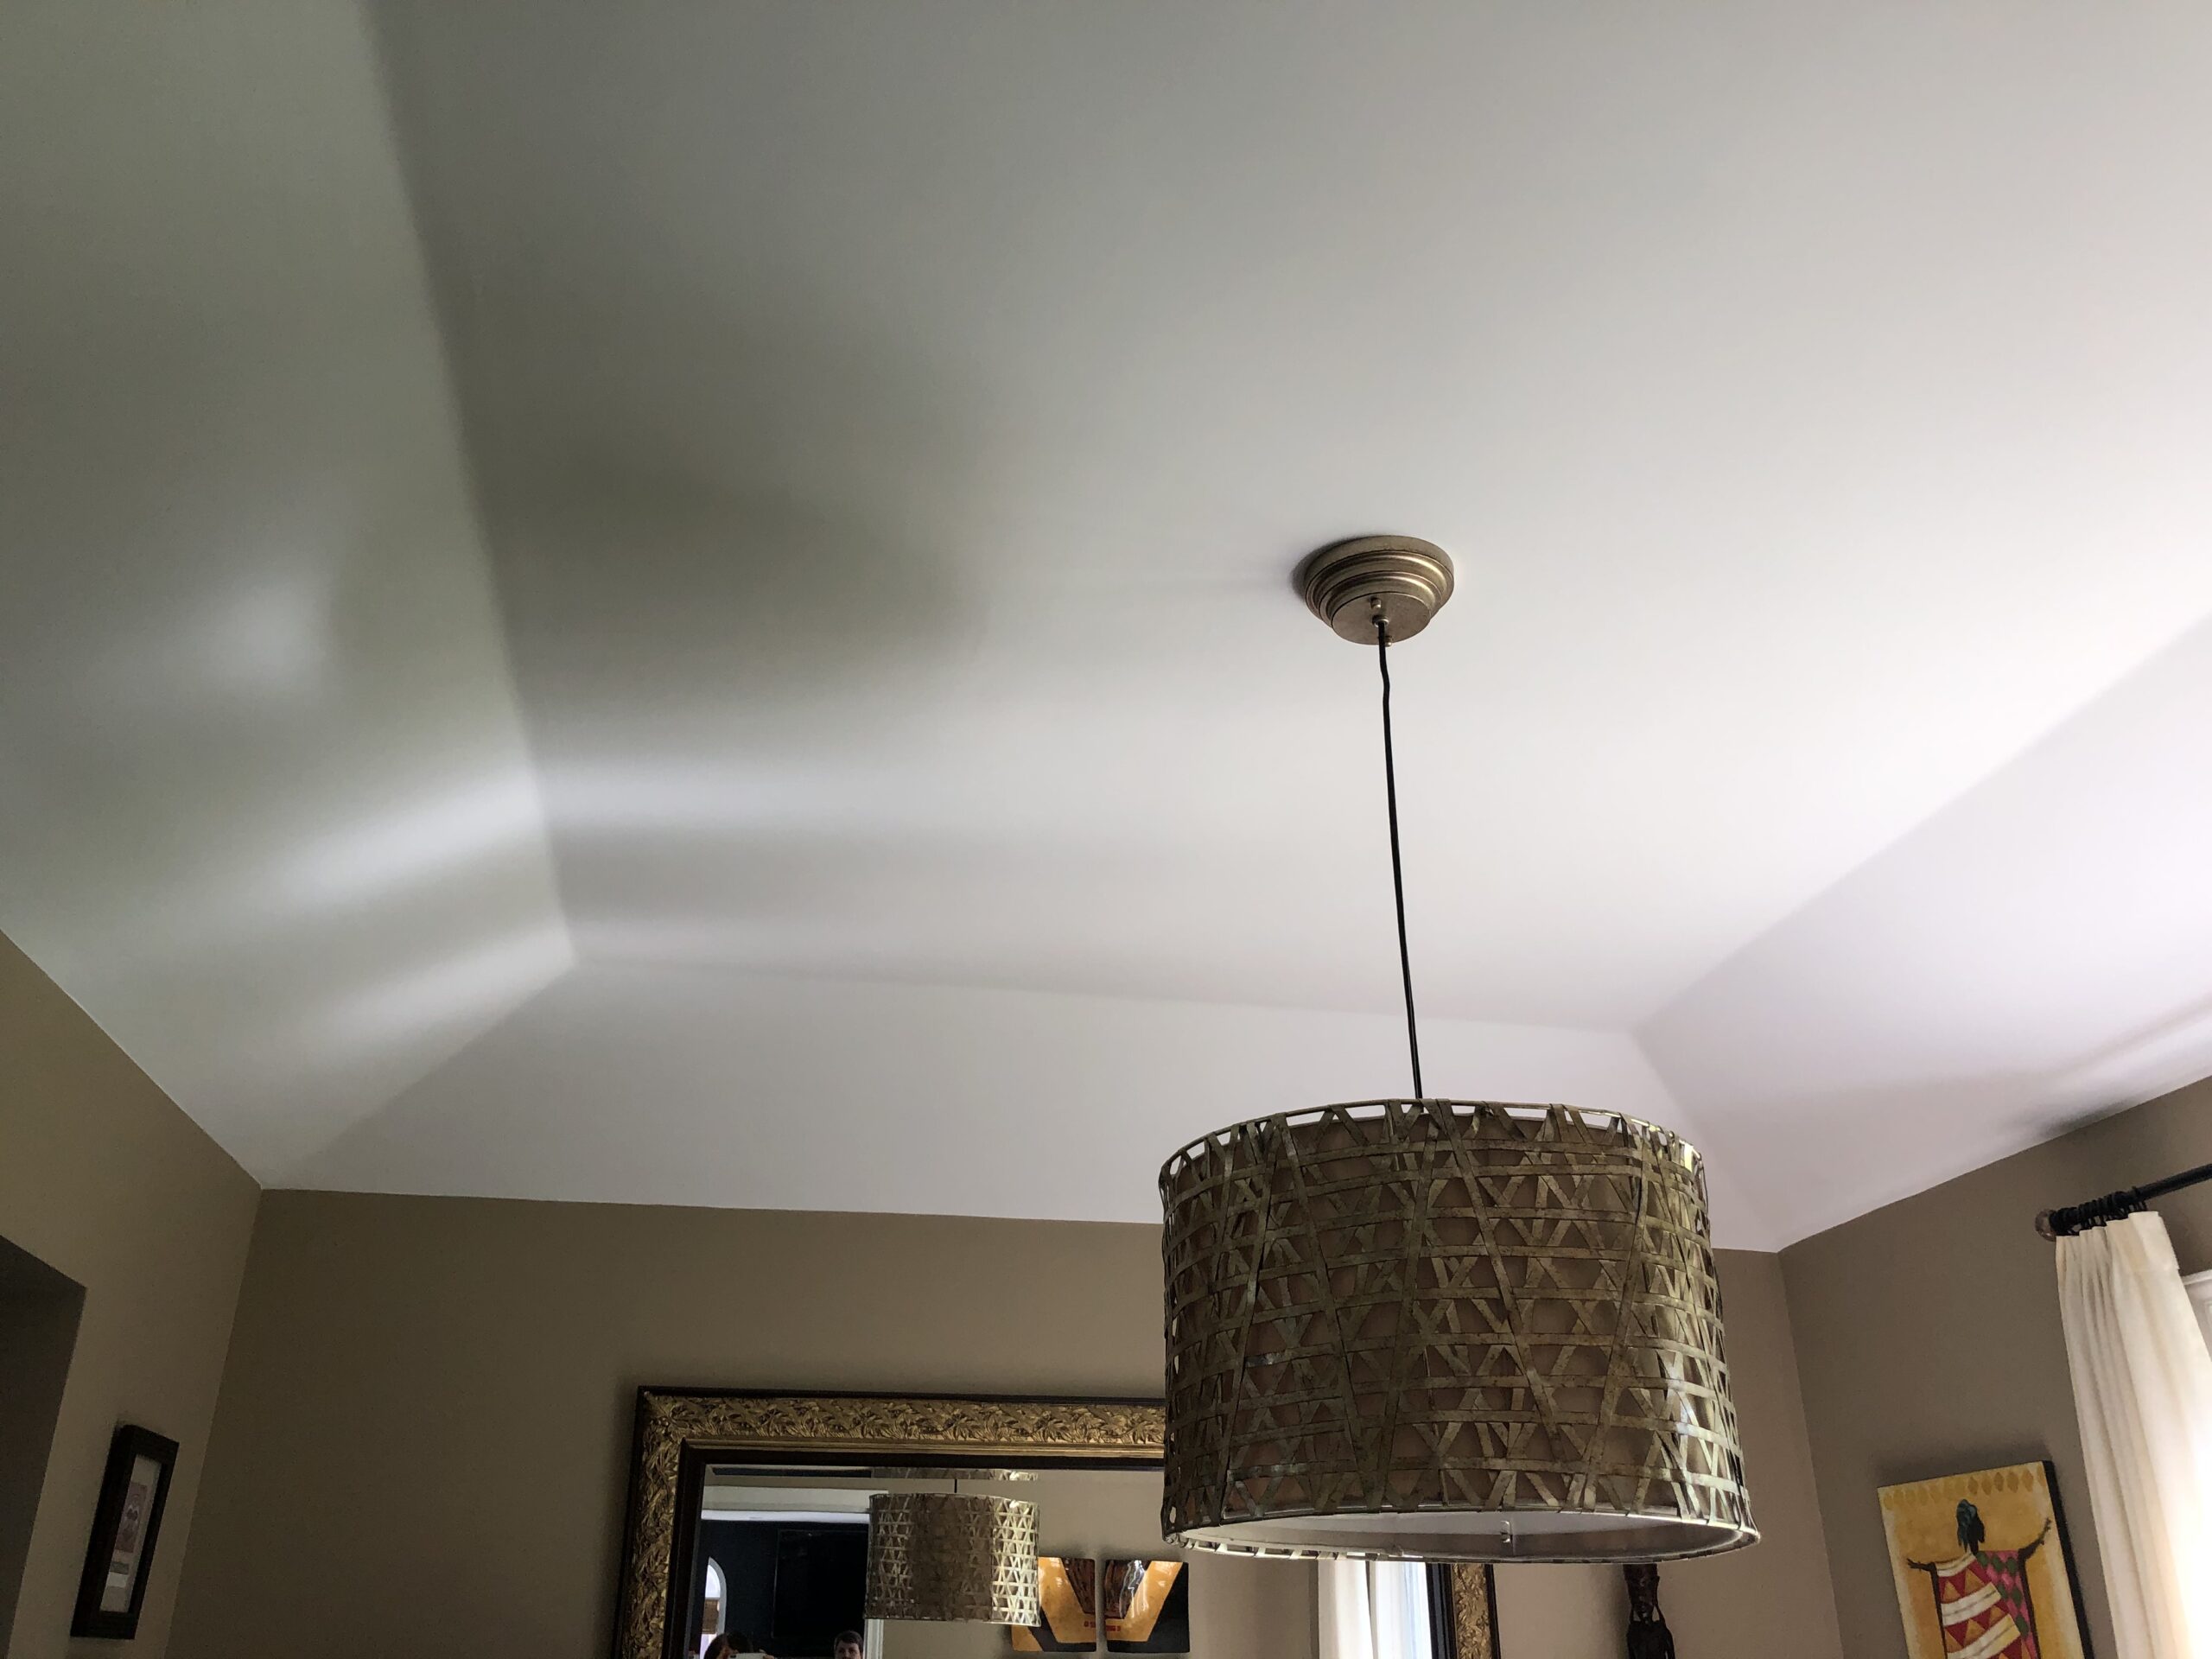
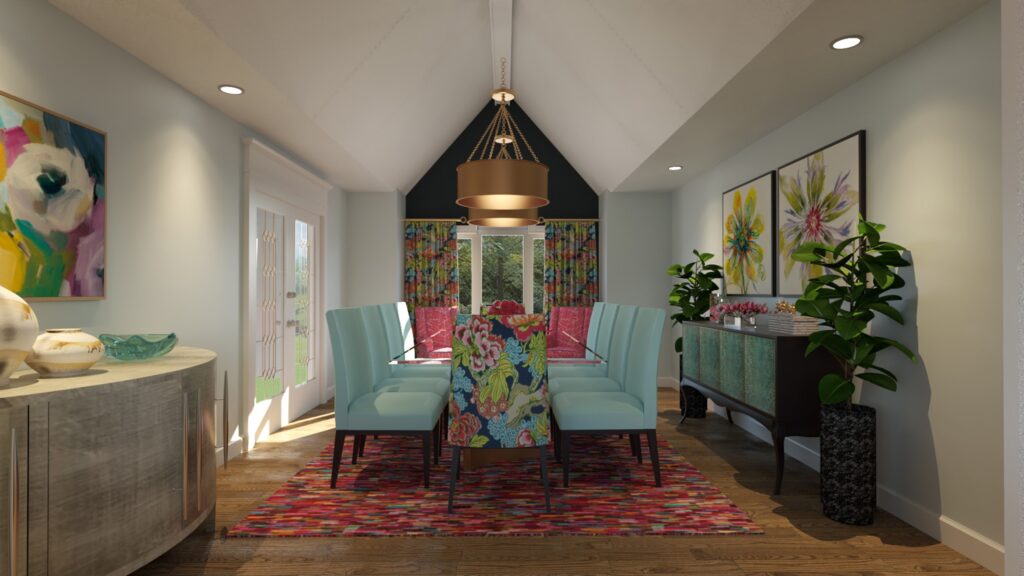
DINING ROOM DESIGN WITH CARIBBEAN FLAIR
While this renovation project was underway, the clients were lucky enough to take a break and vacation in the Caribbean, which inspired this dining room design and décor. How gorgeous is this room to come home to after a sunny vacation♥!
You can see the full kitchen and dining room here
The dark blue end wall accentuates the room’s architecture and matches the new blue cabinets in the kitchen.
The gorgeous gold pendants cast the most beautiful glow in the evening and bring a touch of glam to the space.
Side chairs in aqua-coloured fabrics, with a nautical decorative tape trim on the back, continue the vacation vibes.
The host chairs are upholstered in a large floral print fabric reminiscent of gorgeous scented tropical flowers, and the wing chairs by the front window are dressed in a hot pink geometric pattern.
I selected these stunning sideboards for their shape and colour. The perfect sideboard with aqua panel doors and dark cabinet and legs, and the bowed front sideboard with a soft metallic finish.
A bright and cheery multi-coloured rug in a riot of colours grounds the space and keeps the energy up in this lovely room.
Some of my must-have final touches are always the perfect piece of artwork and accessories. These add that extra personal layer to make a room feel finished and cozy. Case in point, this gorgeous, airy, and cheery room.
One of the best parts of this room is that it is as lovely during the day as it is at night. Scrumptious breakfast for a crowd, and later on entertaining guests like you were at a 5-star Caribbean hotel.
Hard to imagine now that this was the BEFORE Dining Room.
See how we transformed another dated ’90’s kitchen here
READY TO RENOVATE YOUR KITCHEN?
LET’S FACE IT, renovations of any size are not for the faint of heart on a good day! It can be a hair-pulling experience if you’re trying to go it alone and are not experienced in all things renovations. Don’t put your home’s value at risk.
Schedule a FREE DISCOVERY CALL. Select a date and time from our calendar below, and let us help you bring that dream kitchen to life!

Serving Cornwall, Brockville, Ottawa, and surrounding areas