
- February 2, 2020
- Anne-Marie Brunet
Anne-Marie Brunet, CMKBD, CAPS
A cozy Log Cabin gets the luxury treatment!
When I first met with these clients in late 2017, it was for a kitchen design consultation. They told me the history about building the house 20 years ago, and how they knew at the time they didn’t have the money to do everything they wanted and instead focused on getting a solid infrastructure including the mechanicals – what I like to call the heart and lungs of a building – knowing full well that they would update the interior as the budget allowed in the future. Can we all relate to that, right? Do what you can when you can, but have a plan!
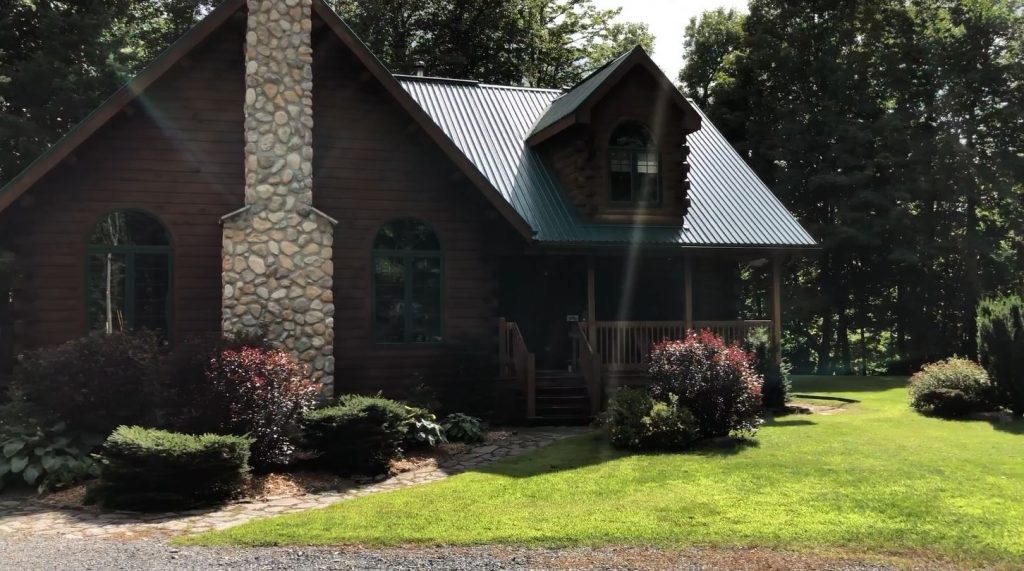
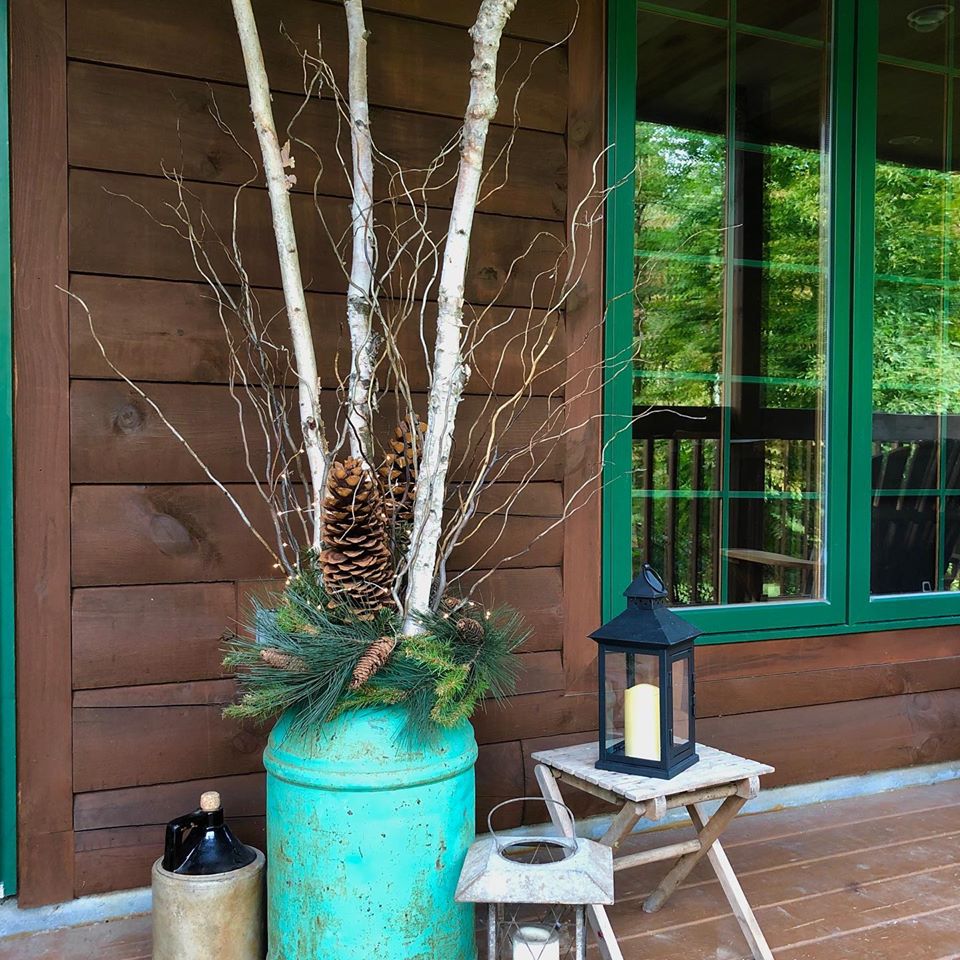
The log cabin itself is gorgeous and sits on the banks of the Raisin River in Williamstown, Ont. (the home of Canada’s oldest annual county fair!)
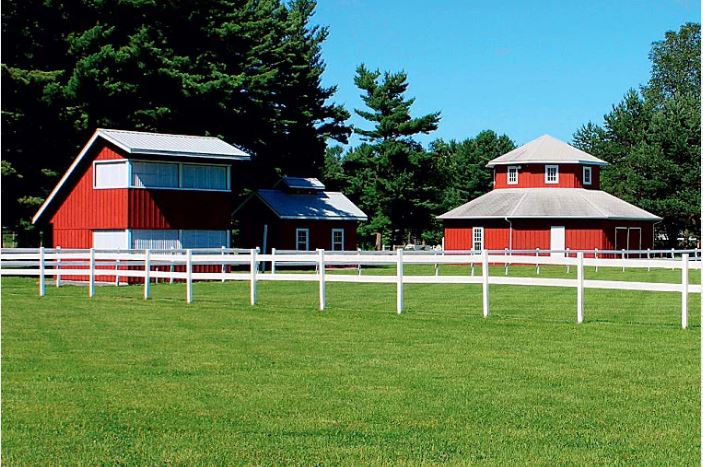

The exterior of the home is everything you’d imagine a log cabin to be, beautiful, substantial logs with green painted windows and doors, high-pitched roofs, floor-to-ceiling river rock stone fireplace and chimney, a welcoming front porch, and a separate garage that looks like its own little fairy tale.
The Raisin River runs behind the cabin ♥
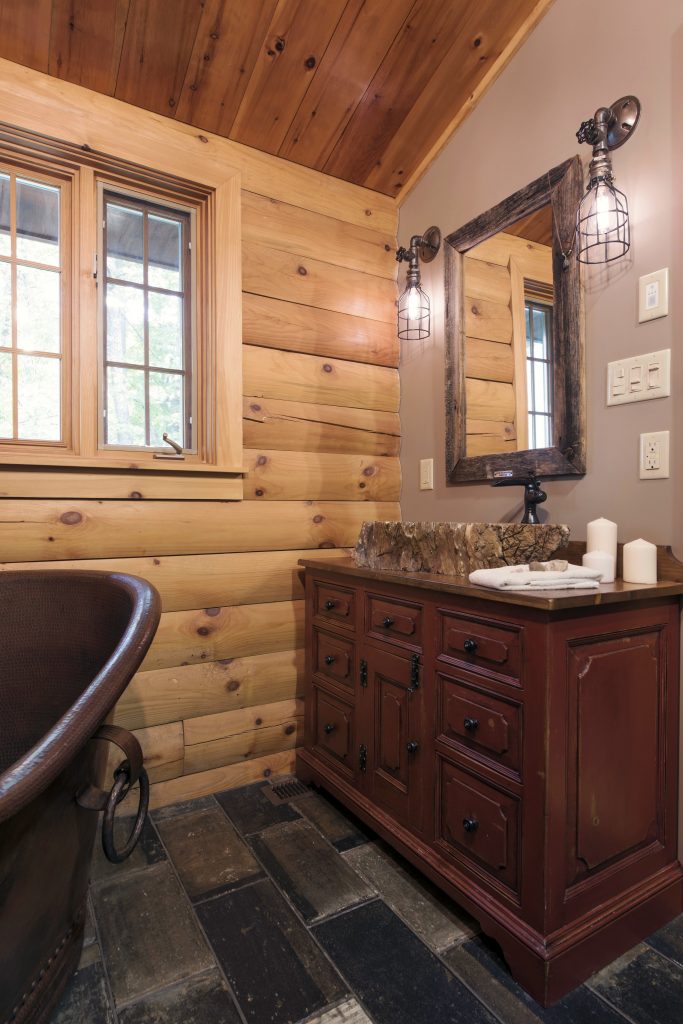
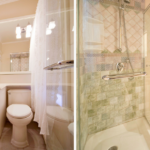
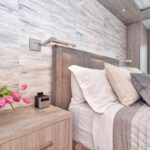
The clients took me on a tour of their home, giving me a sense of the renovations they’d already done; the main floor bathroom and master bathroom, which were painstakingly researched and lovingly executed to complement the vernacular of a log cabin – kudos to them on those two fronts!

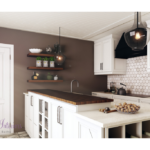
Back in the kitchen the clients tell me everything they dislike about it; floors, cabinets, countertops, lighting, etc – the list was long haha!!…and then they described the feeling they wanted and what they were hoping to end up with in terms of style that would suit a log cabin; rustic, old-world European and with a bit of a twist of industrial vibe.
During our discussions, I made observations and diagnosed a few problem areas and shared my suggestions on how we could get the design more in line with what they were hoping for, and what the log cabin deserved.
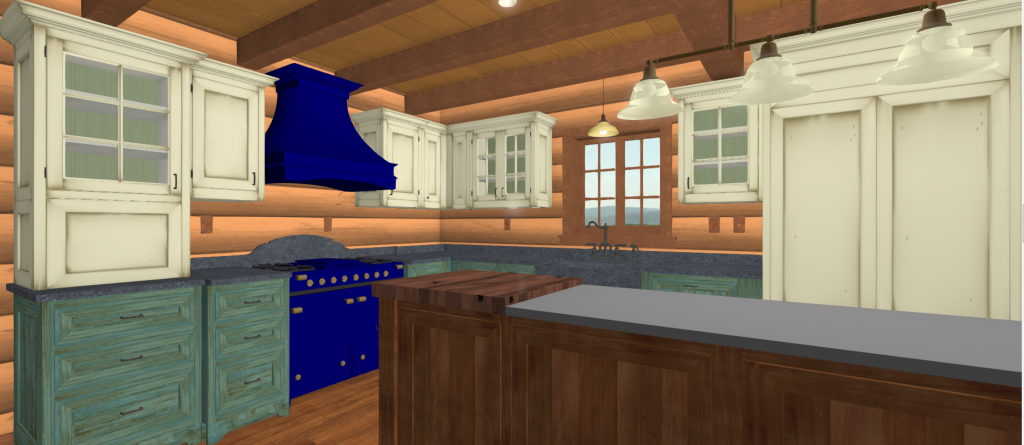
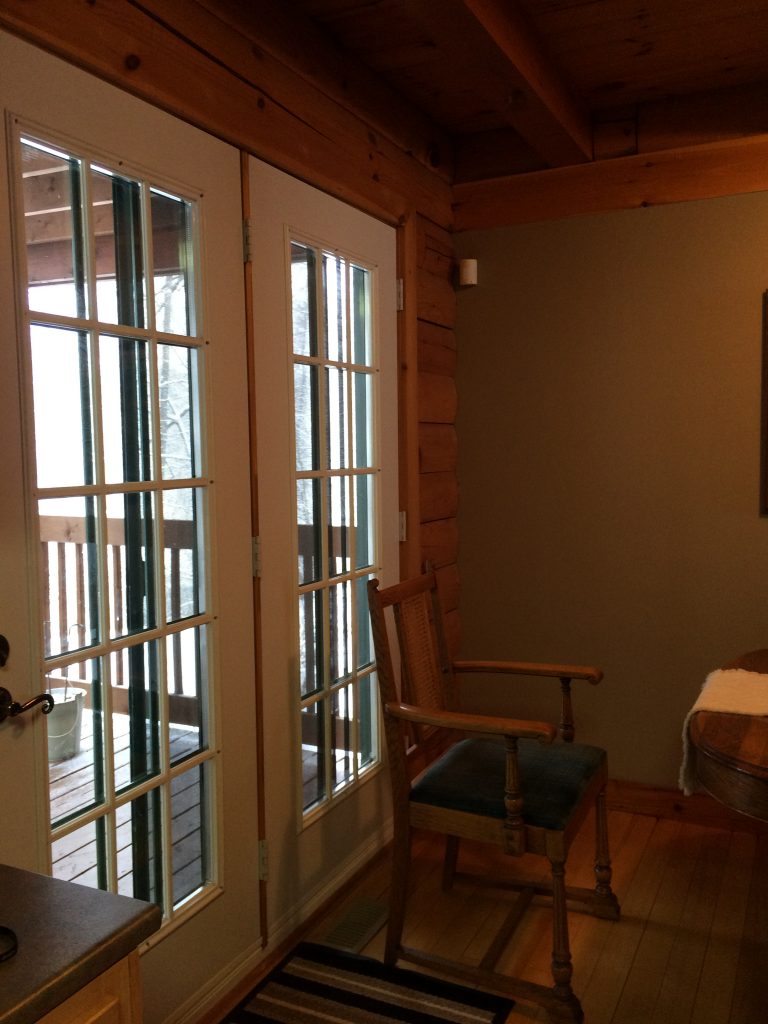
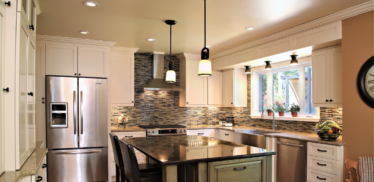
Here are some of the ‘Before’ snaps with observations;
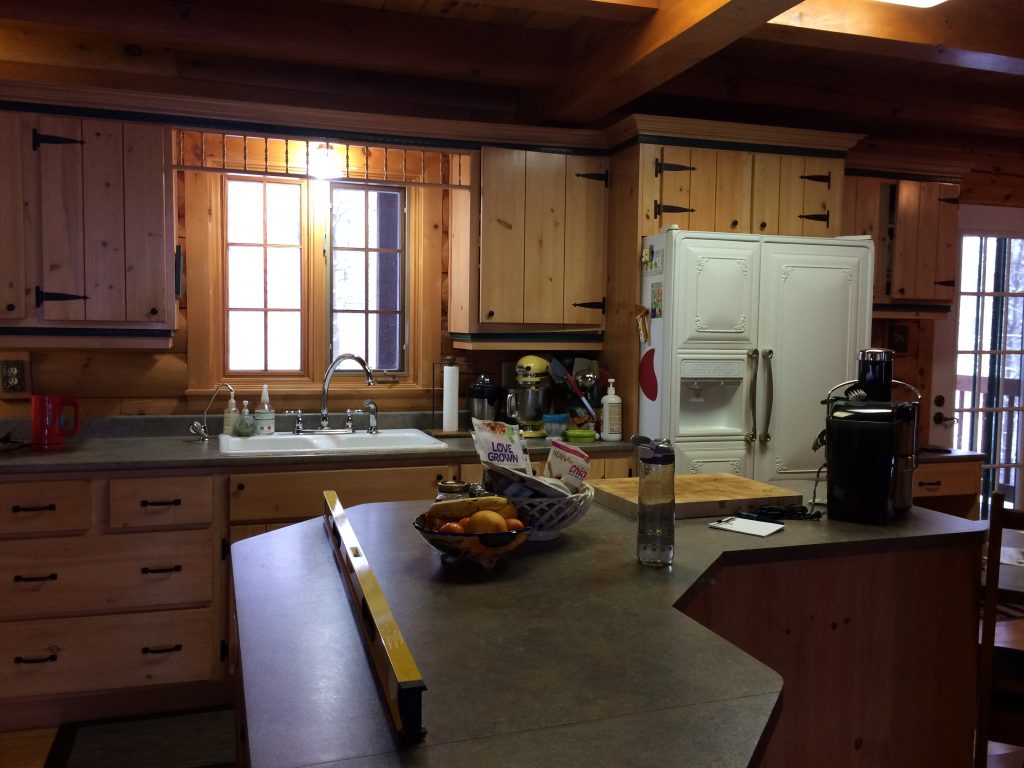
APPLIANCES
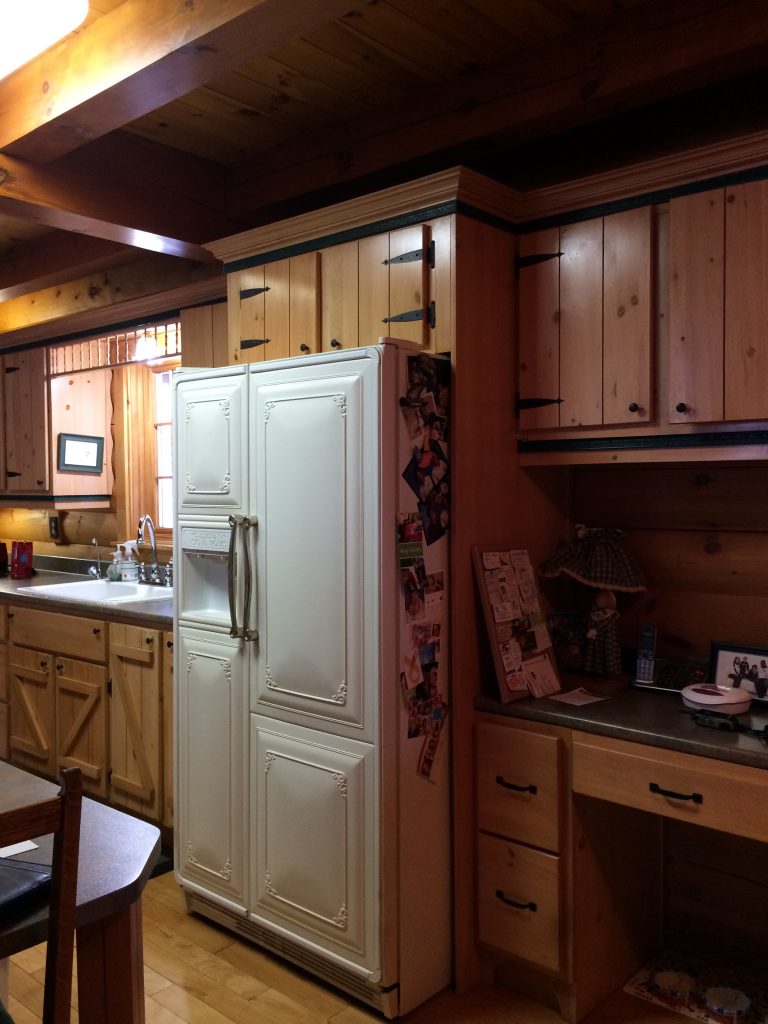
While the appliances had a vintage look, they were too big for the diminutive kitchen footprint. The fridge in particular stuck out so far into the work aisle that when the door was open no one else could get by it.
DISHWASHER
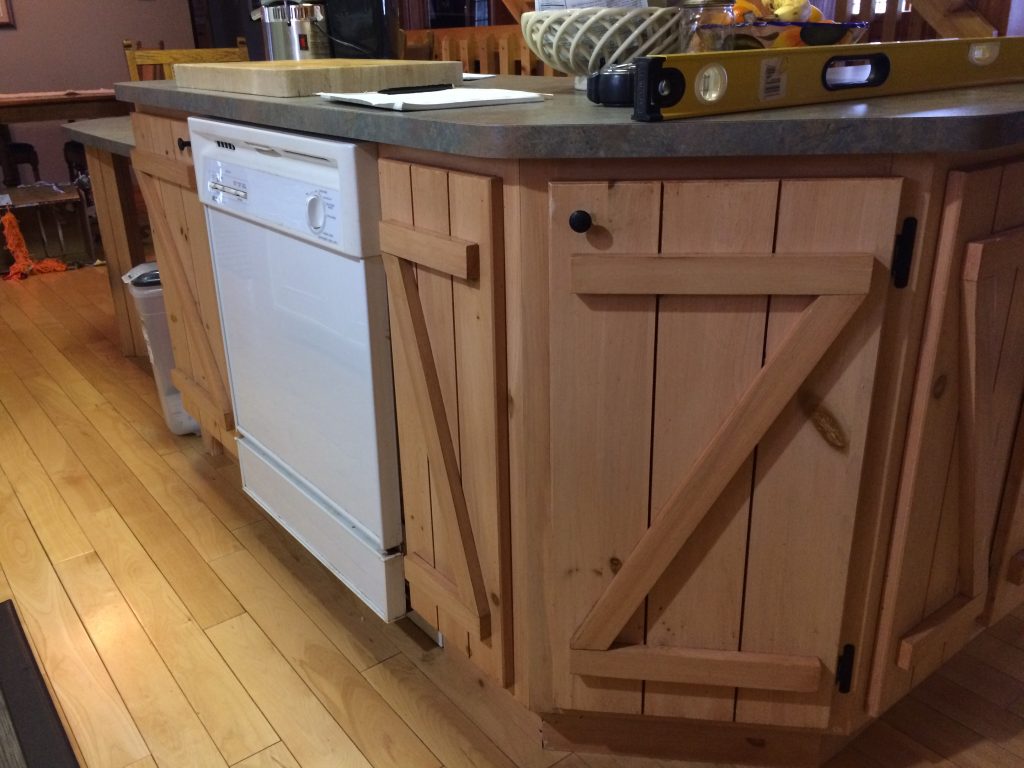
The dishwasher was opposite the sink, in the island, which meant wet floors pretty much at every mealtime, when loading from the sink to the dishwasher.
KITCHEN ISLAND
While the island seemed large, its lazy ‘L’ shape served only to make the space feel more cramped than it needed to be.
LIGHTING
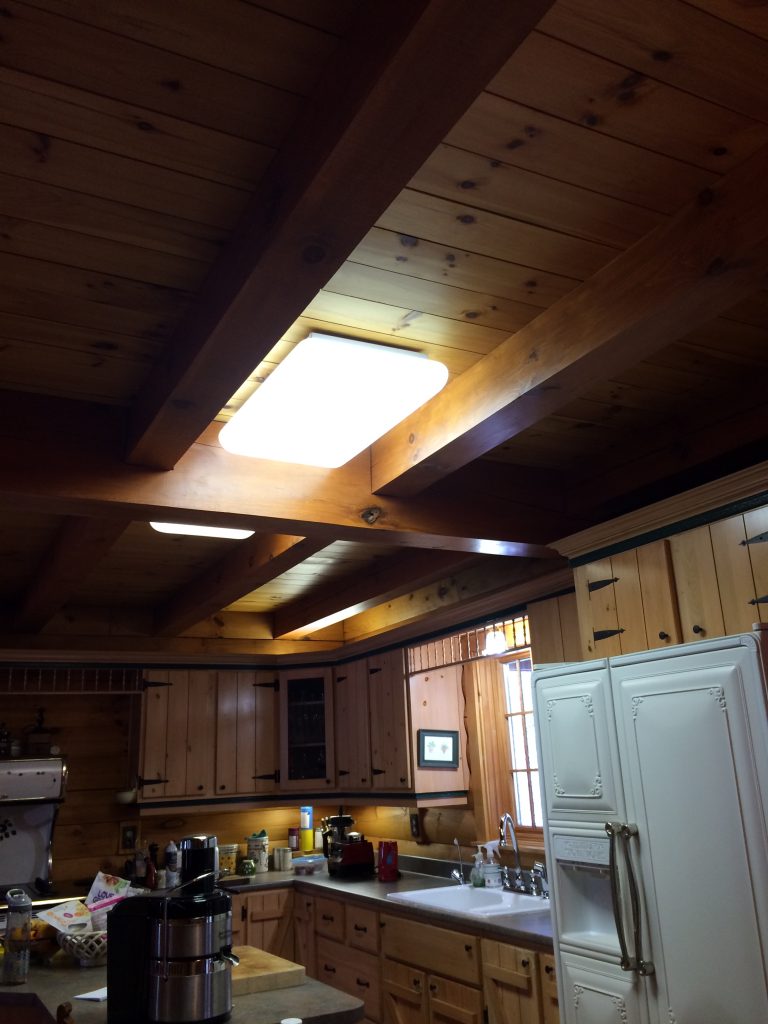
The lighting was pretty basic with cloud fluorescent ceiling fixtures. While functional, they were not very attractive.
KITCHEN DESK
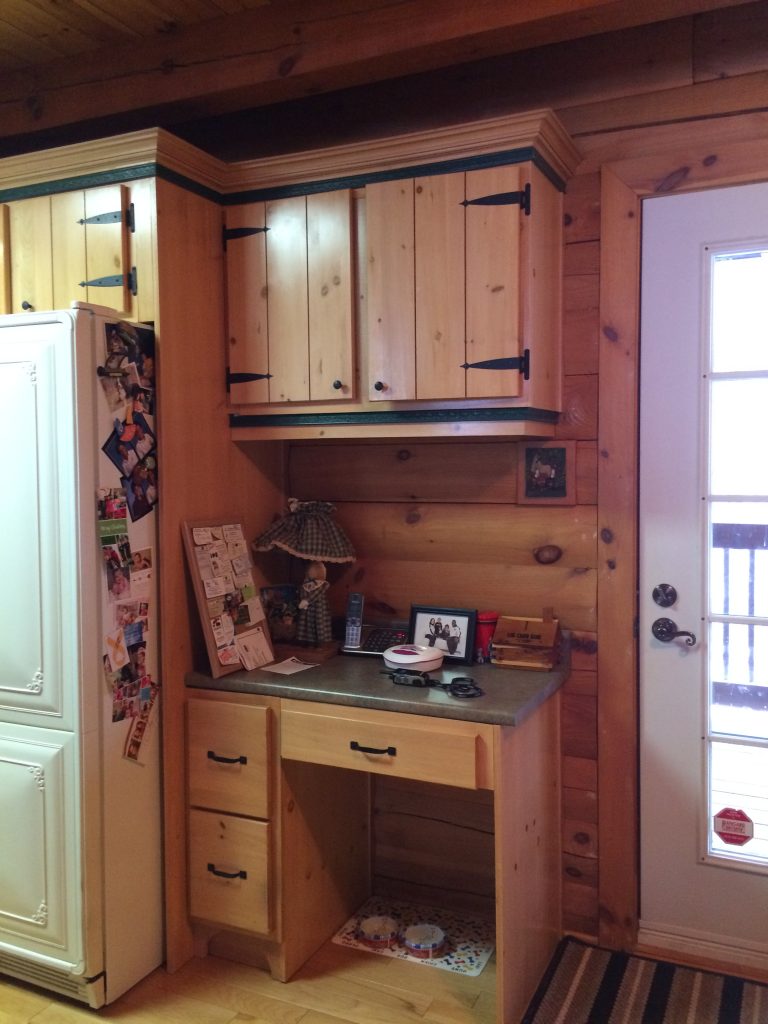
There was the ubiquitous kitchen desk of the 80’s design era that became more of a repository for anything and everything, over and above pens and pencils.
Except for the vintage-looking appliances, the kitchen looked like a base-camp kitchen. It had all the basics but was, well, pretty basic.
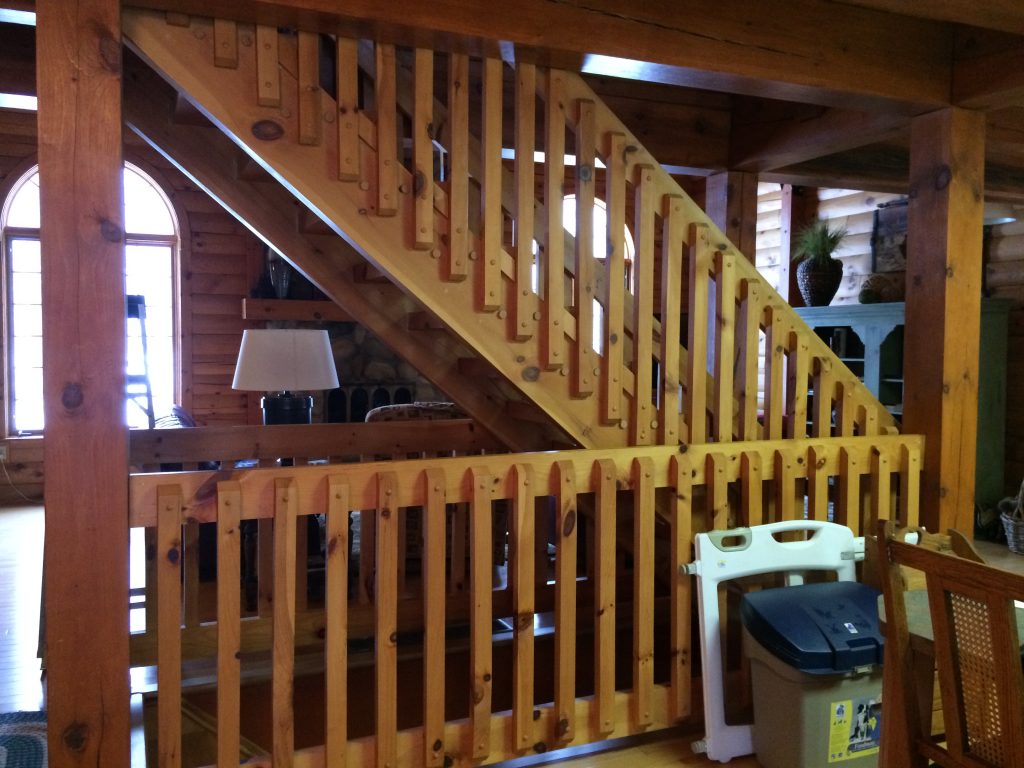
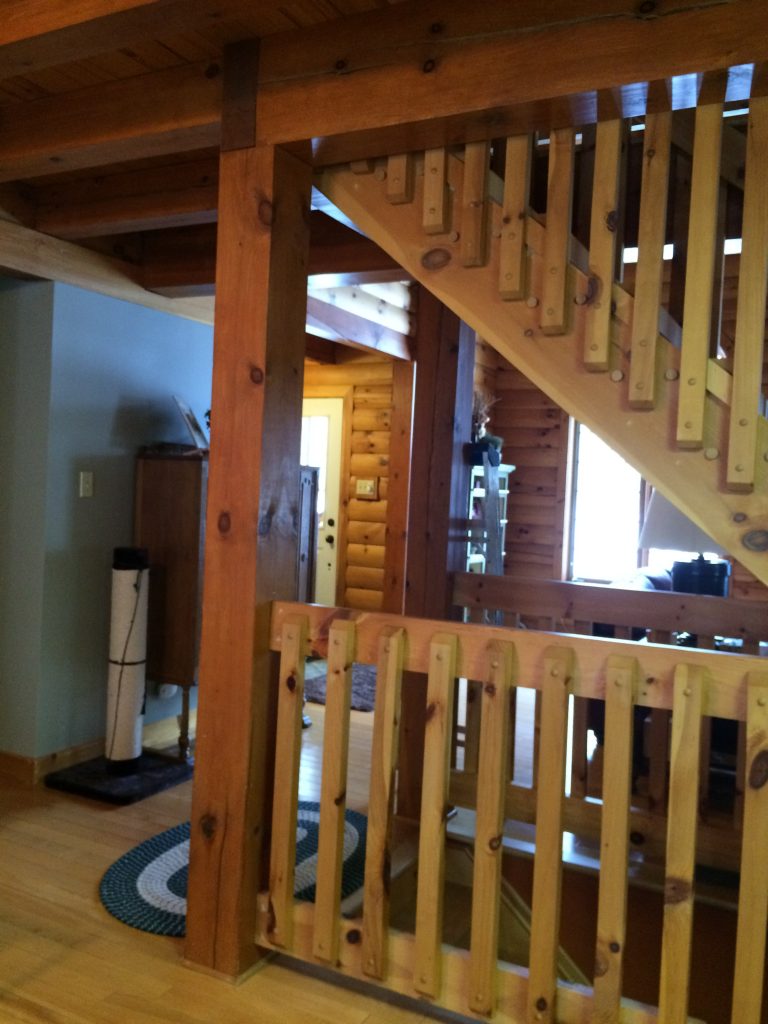
STAIRCASE
As we were discussing the vision for the kitchen, my eyes kept darting over to the staircase – repeatedly.
I guess they must have noticed because one of them asked for my unbiased, professional, and honest opinion about the staircase.
Now, at a first meeting I’m always a bit nervous when someone asks for THAT opinion – before we’ve finished ‘dinner and a movie’ haha… I’ve learned over the years that while people ‘think’ they want that opinion, not everyone can necessarily handle the message, and I certainly don’t want to hurt anyone’s feelings over material things. After all, most clients have been ‘living with’ and ‘living in’ these surroundings for a long time, and it’s easy to get inured by daily routine and surroundings.
Sometimes you just need a fresh pair of eyes to shine some light on the subject.
BUT after everything we’d discussed, and understanding their style and having a vision of what that kitchen could be, I was happy to broach the staircase subject, albeit delicately.
For anyone who thinks that, because one component in a space is not in the original intended scope of work and shouldn’t be discussed, I will usually address it at some point if it will greatly impact the design or layout. I would be doing my clients a disservice by not showing them ALL the possibilities as they relate to the overall design and flow.
BACK TO THE STAIRCASE
While I understood the location of it, it was so disruptive to the whole flow of the main floor with its deck-style railing. You know the ones that are popular with contractors and lumber yards.
It was visually heavy, choked the interior, and cut off the kitchen from the rest of the house. I think they ‘felt’ that, but it was never articulated out loud, nor was there ever a solution brought forth for a remedy.
In their initial budget consideration, the staircase was not part of the equation, but after articulating the whys and why nots, we were talking about it…they were considering it… so that’s a good starting point. More on this a little later – you won’t want to miss the ‘after’ picture.
LIGHTING A LOG CABIN Part 1
The other challenge was going to be the lighting – and getting it where we needed it. IT’S A LOG CABIN – THERE’S NOWHERE TO RUN OR HIDE WIRES – other than where they already are from the original construction. Read on to Lighting A Log Cabin Part 2 and find out how we overcame that challenge.
APPLIANCE WISH LIST FOR LOG CABIN
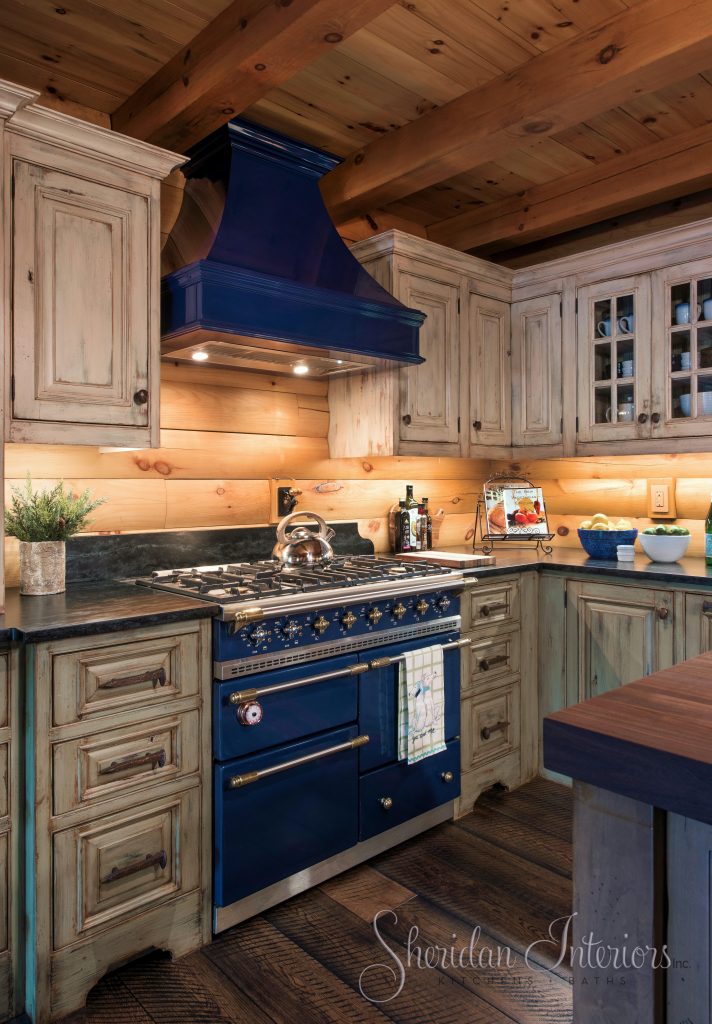
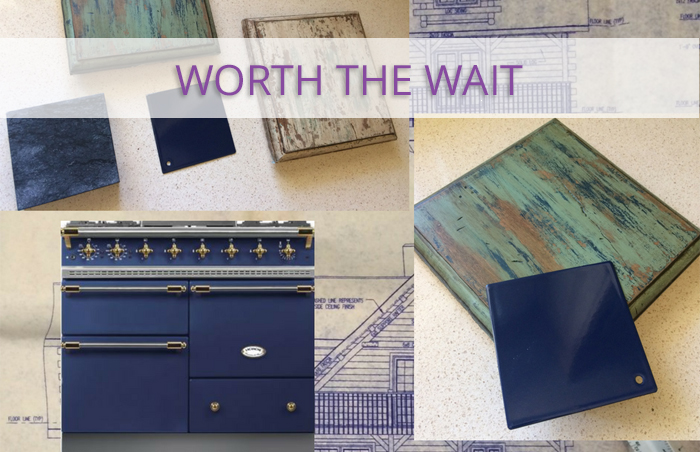
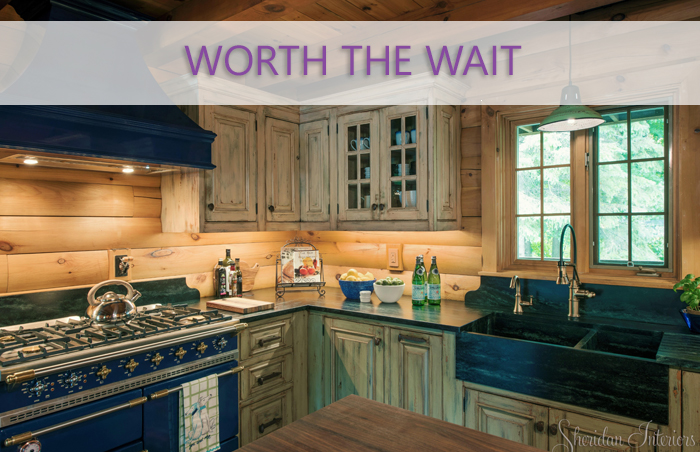
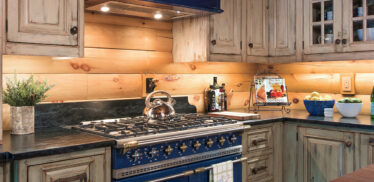
The client was excited to let me know that they would be purchasing new appliances – yay for them! – and had their eye on a French Range from Lacanche. Can I just say that it is GORGEOUS and absolutely STUNNING in person!!
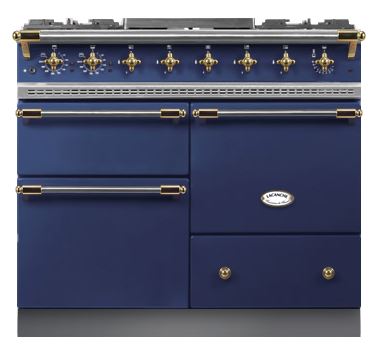
Julia Childs move over – it’s game on!
What a great jumping off point for me, and one that would inform future decisions and considerations for style and finishes. The French range fell into the category of the Old-world European look they wanted.
Check that box off!
Other than the French range they were purchasing, I had free rein to design something incredible.
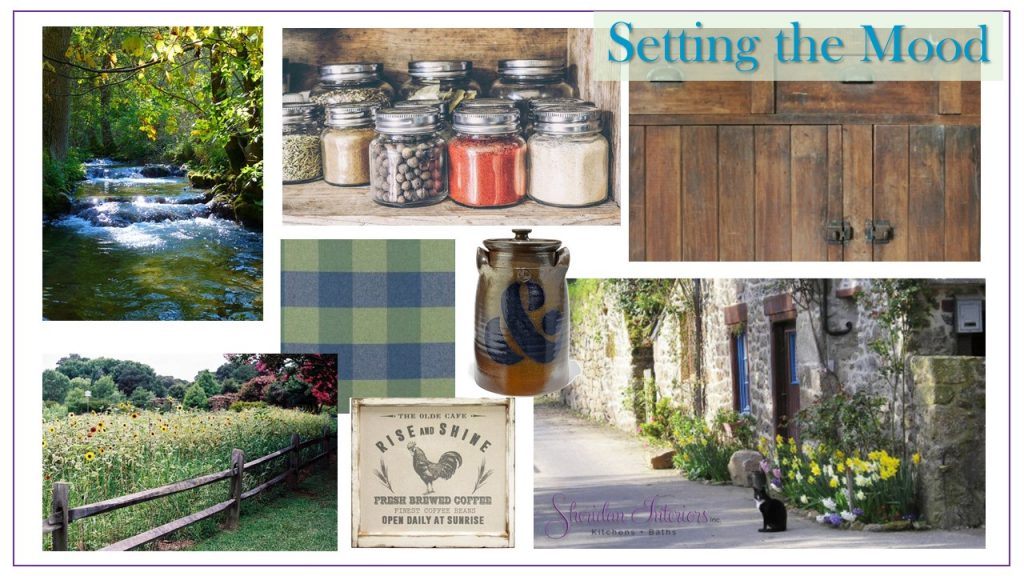
DESIGN AND FINISHES FOR A LOG CABIN
When I set off on a new project, I like to create an inspiration board. This helps narrow the focus and visualize the overall ‘feel’ of the project and includes colours and textures I’d like to incorporate. I call these ‘Setting the Mood’ boards.
Back in the office, I got busy first laying out the space and seeing what the possibilities could be while keeping in mind the limitations of log cabin construction, and all of their kitchen requirements; appliances, dishes, cooking styles, food prep, food preferences, storage etc.
Anyone who’s worked with me knows that…
* I WILL BE TAKING PICTURES OF ALL YOUR STUFF *
– yes I will –
This is not the time to clean up before the designer comes – trust me.
“If I don’t know what you have to store, I can’t give you a solution”.
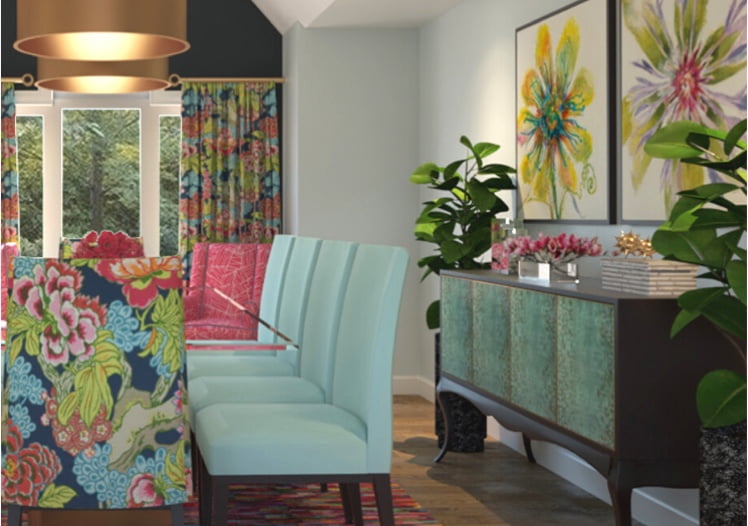
Once the layout was defined, I set out selecting and coordinating all of the materials that would go into this project – and there was A LOT!
Making these selections and curating the look and feel for this project was the most liberating journey for me as a designer, as the clients allowed me carte blanche to create and curate the perfect ensemble.
I ended up with a total of 10 different materials/finishes for this small space. Yep 10!!…. I know, right?? I even surprised myself, but it all looked sooooo good together in my brain and on paper.
I feel pretty good about arriving at the layered look I was going for, and I have to say, is part of what makes this renovation look like it was always there and grew over time, and not just another NEW kitchen that so glaringly doesn’t belong in a log cabin.
CLASSIC YET TIME-WORN FINISHES FOR A LOG CABIN
TIME TO SHOW IT ALL OFF
Now I have to admit that the presentation portion of a project gets me excited and nervous all at the same time. It’s sort of a good/bad addiction..haha!!
I always start with the layout first and explain how everything works, where things are located, and how each item relates to another.
The first reaction and comment was “Oh, you didn’t change the layout”
Ummm, no, it’s a log cabin – we can’t move walls or stairs, and electrical is going to be a pretty big challenge – this is the footprint we have to work with.
I tell myself just wait… they’ll get it’ when we get to the 3D elevations and views on the computer. It’s easy to overlook how changing materials can make a huge impact on how a space looks and feels….read on.
During the meeting, the staircase subject came up again. Of course, I came prepared with inspiration ideas for the staircase railings, after all, I’d been thinking of it since I first saw it.
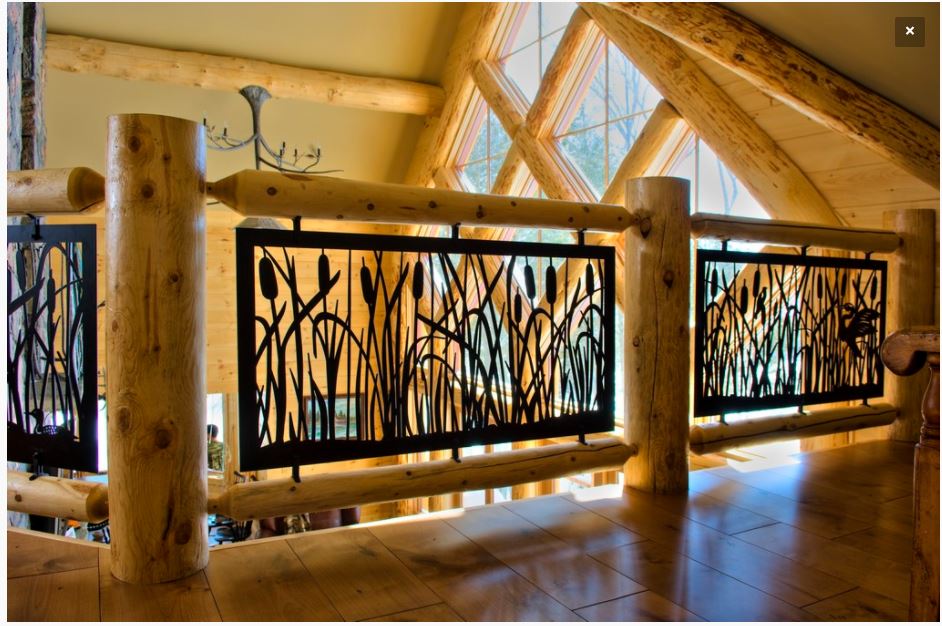
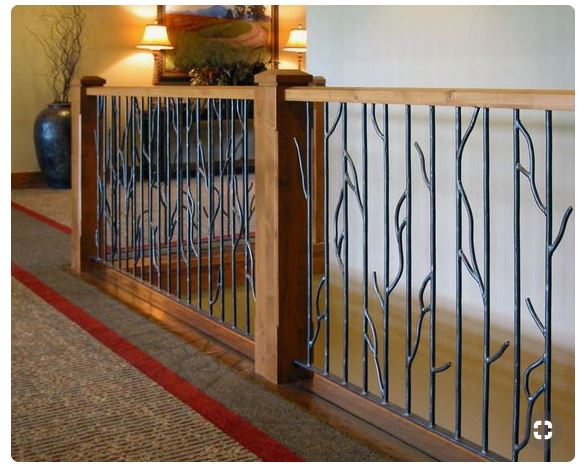
After reviewing the whys and why not of the plan, seeing the coloured 3D renderings, the proposed materials, shapes, colours, and finishes, they were excited, and I think I might have won them over.
* It was country, it was rustic, Old-world European and it had the industrial vibe they were looking for, and it all felt authentic to the cabin and their style! *
Their vision was coming to life – on paper, at least at this point.
After seeing their plan in 3D, they now understood how including this staircase transformation would enhance the overall renovation, and it would not make sense to keep the old staircase when so much attention and detail were being showered on the kitchen and dining areas, so it was added to the scope of the project.
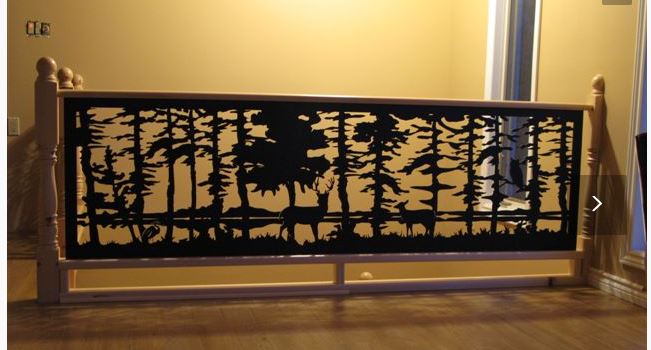
Below is the template that was produced to fabricate staircase railings. A wonderful artistic effect of trees in the forest, by artist Noella Cotnam.
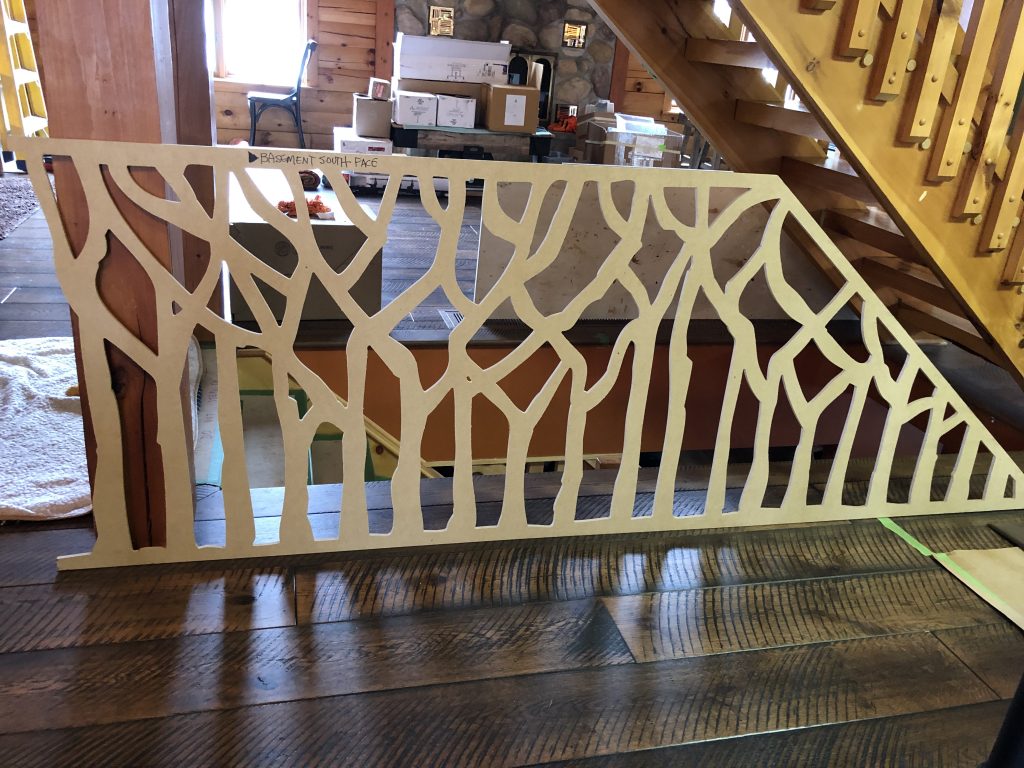
Again, kudos to the client for seeing and understanding the value of a good design and how it impacts the whole.
We now have a consensus on the layout, and they love the 3D elevations. Time to dive into materials and finishes – all 10 of them – yikes! Now I have to say that I was a bit nervous and confident all at the same time (crazy addiction that is), presenting so many different materials and finishes for such a small space, and moreover, how it would be received.
The reaction was the one I was hoping for…
Clients’ comments – ” You nailed it ” !!
That was music to my ears, and I was going to sleep well that night…haha!
Here are just a few of the finishes and materials for the project.
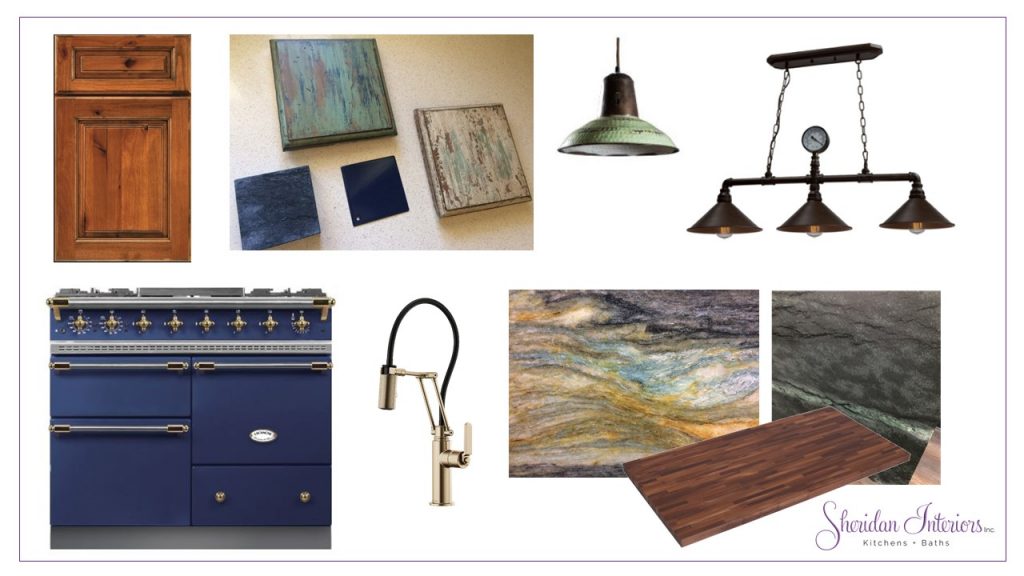
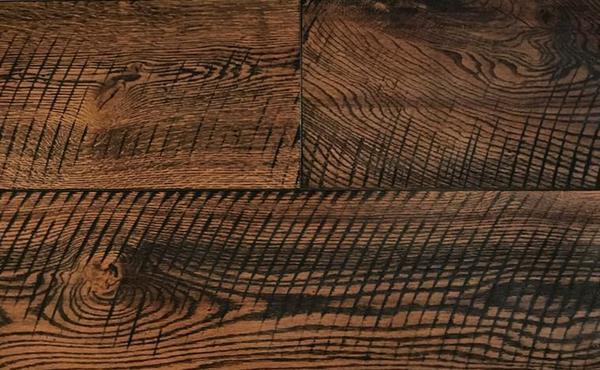
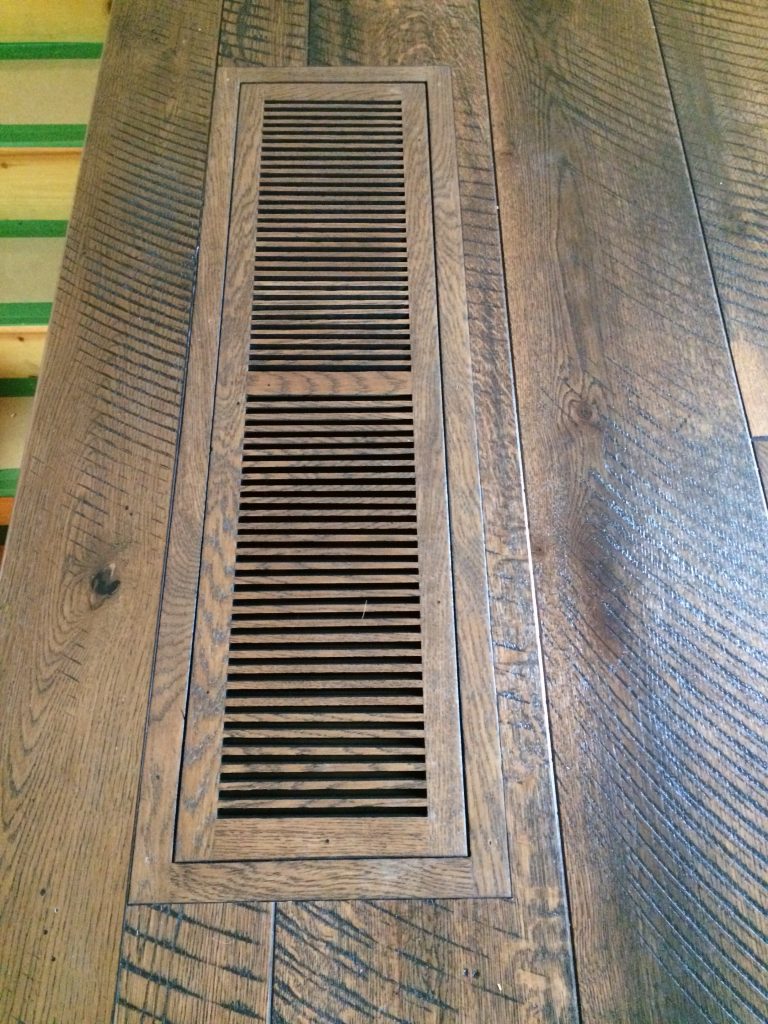
…and I can’t forget to include the stunning wood flooring supplied by Gaylord Flooring from their 1850s collection ♥
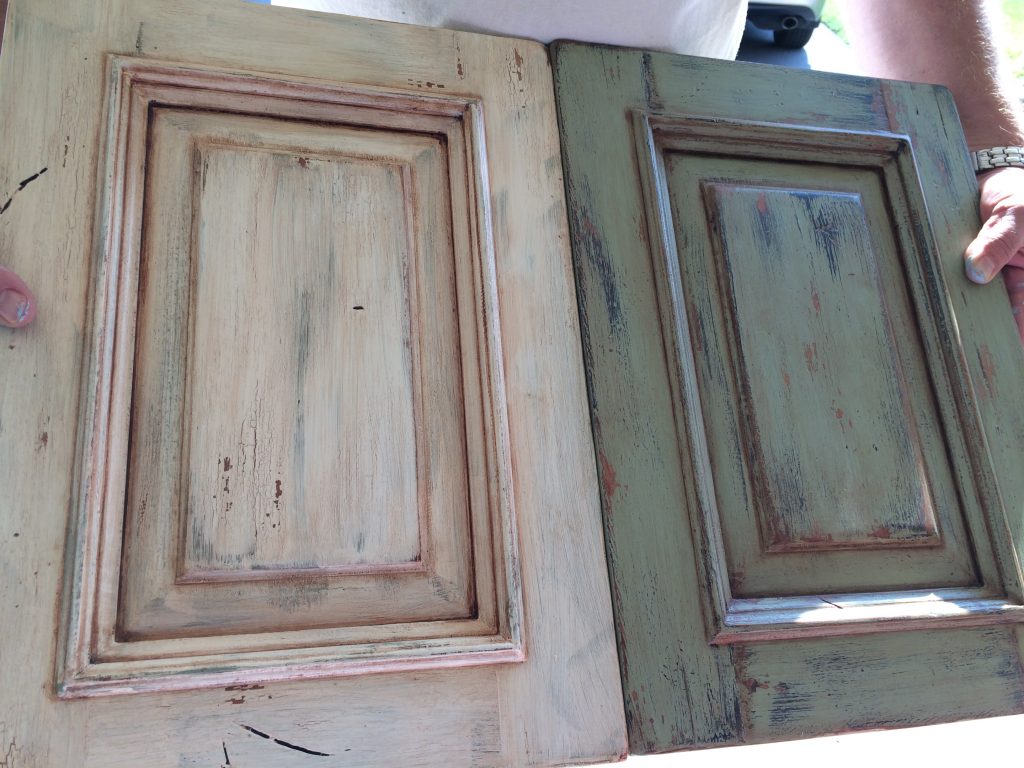
The cabinetry was finished on site and is a 7 layer process for each colour. The base cabinets were to be in a blue-green and the uppers a linen colour.
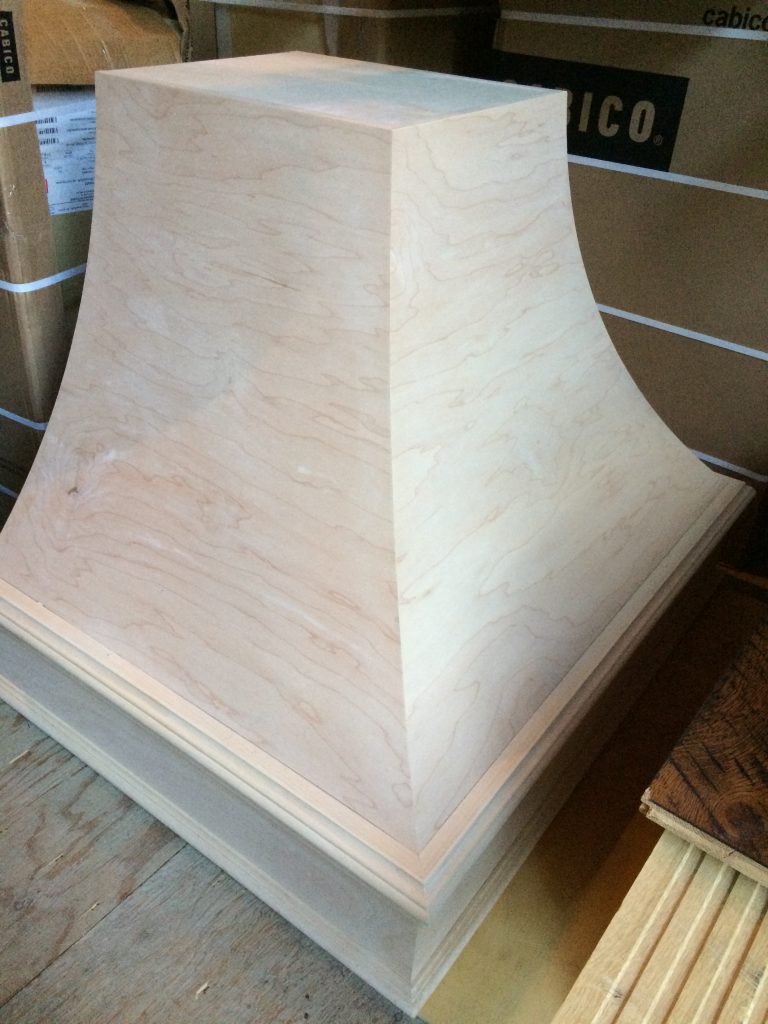
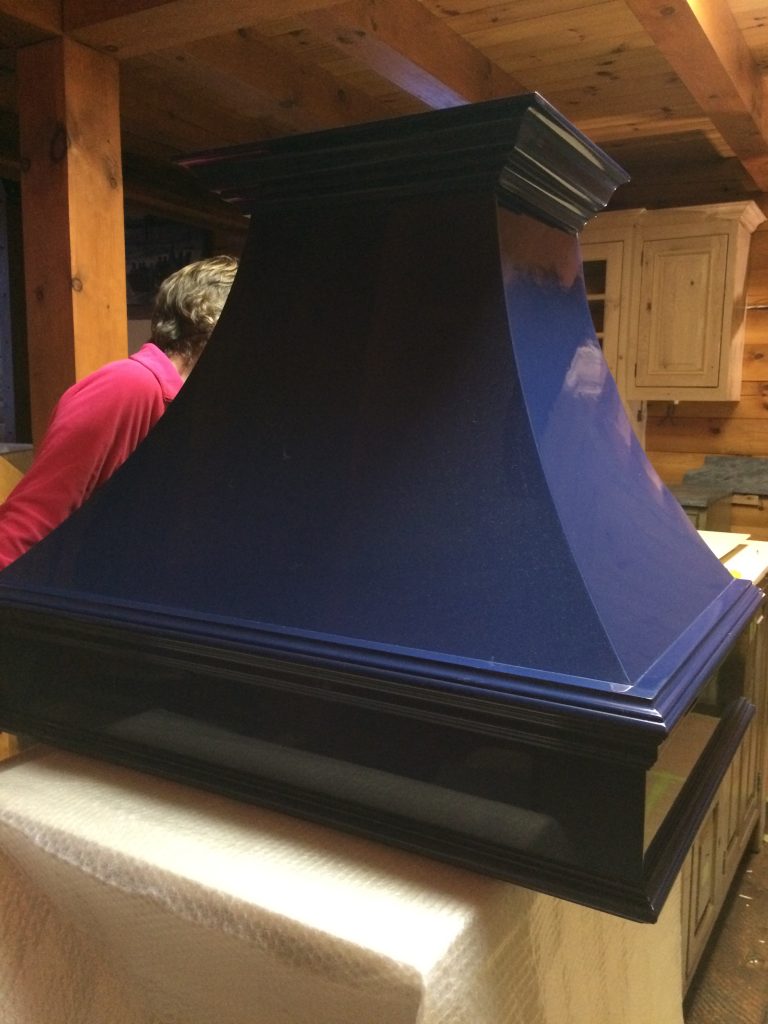
Another challenge was getting a range hood in the right size (to fit between the beams), shape (old-world European), and colour (to match the range). Since we wanted an Old-world European look, and I had exhausted my search for something ‘authentic’, I specified this shaped and curved wood hood and had a local artisan create a porcelain-like finish on it, and the crown moulding, to match the Lacanche French Blue colour. I think it turned out beautifully ♥!
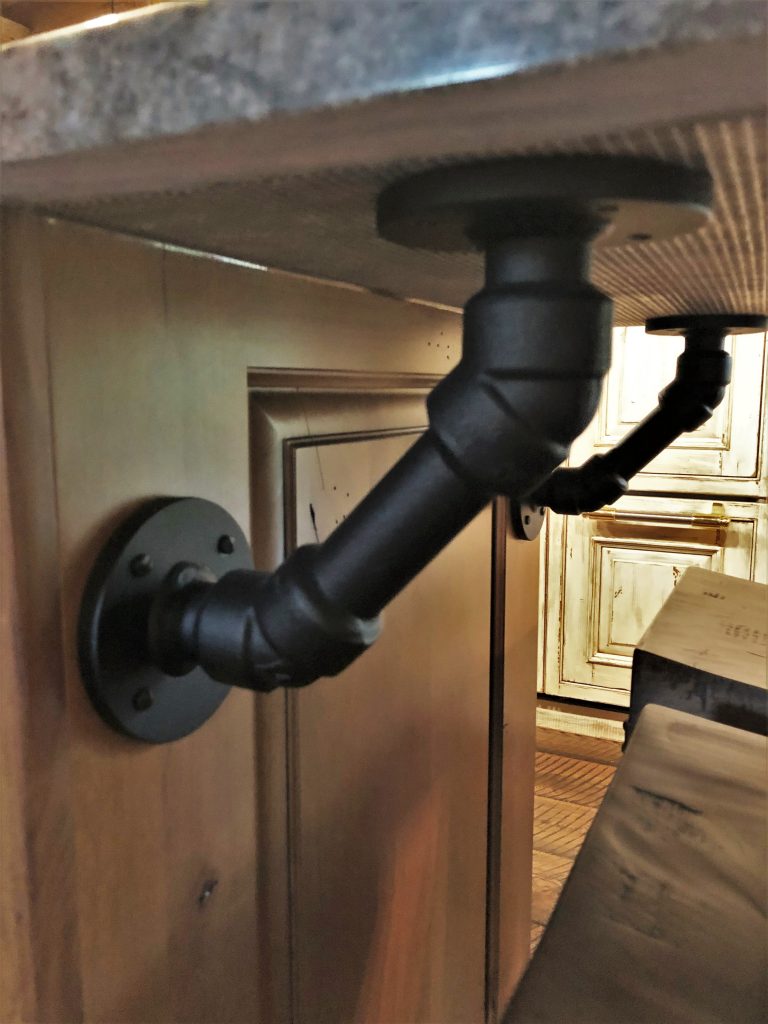
LIGHTING A LOG CABIN Part 2
As the plan was being formalized, I had to address the lighting issue. How was I going to get the lighting exactly where I needed it at the island, sink, under the cabinets, and dining areas?
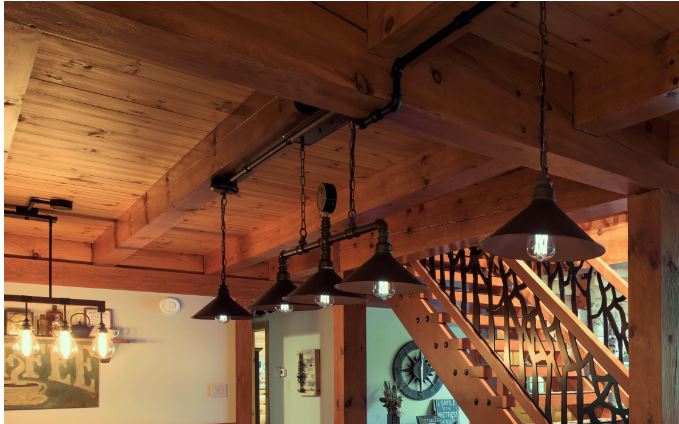
Industrial vibe to the rescue. I had a meeting with the electrician and suggested using piping and bending it around the beams, and then we were off to the races!
Let me tell you, though, there was quite a bit of referring back to the floor plan on the computer, measuring on site (several times), taping on the floor, and figuring out if we could get the new wiring from the basement without it showing on the front of the logs. That was a stressful couple of days for sure!! I’m happy and relieved to report that it all worked out with some sly maneuvering and it looks great for the cabin. Industrial Vibe – check that!
Throughout our project, Anne-Marie and her team were truly creative which resulted in a superior final design. Our kitchen is exactly what we envisioned and even more! I would not hesitate to recommend Sheridan Interiors to anyone in need of a designer who is creative and meticulous
Catherine G./Williamstown, Ont.
. New Staircase and railings
LOG CABIN CREATIVE DETAILS THAT MAKE THE DIFFERENCE
CABINET HARDWARE FOR A LOG CABIN KITCHEN RENOVATION
Over the years, the client had collected railway spikes on her daily walks with the dog. She didn’t know exactly what she would use them for at the time, but this was the perfect opportunity to include them in the renovation.
We had some of them cut into knobs and handles, and a local welder fit them with the appropriate extensions so that we could screw them to the door and drawer fronts. The image below shows one of them in its sandblasted state. We added a rusted patina to age them and a top coat to protect them for daily use.

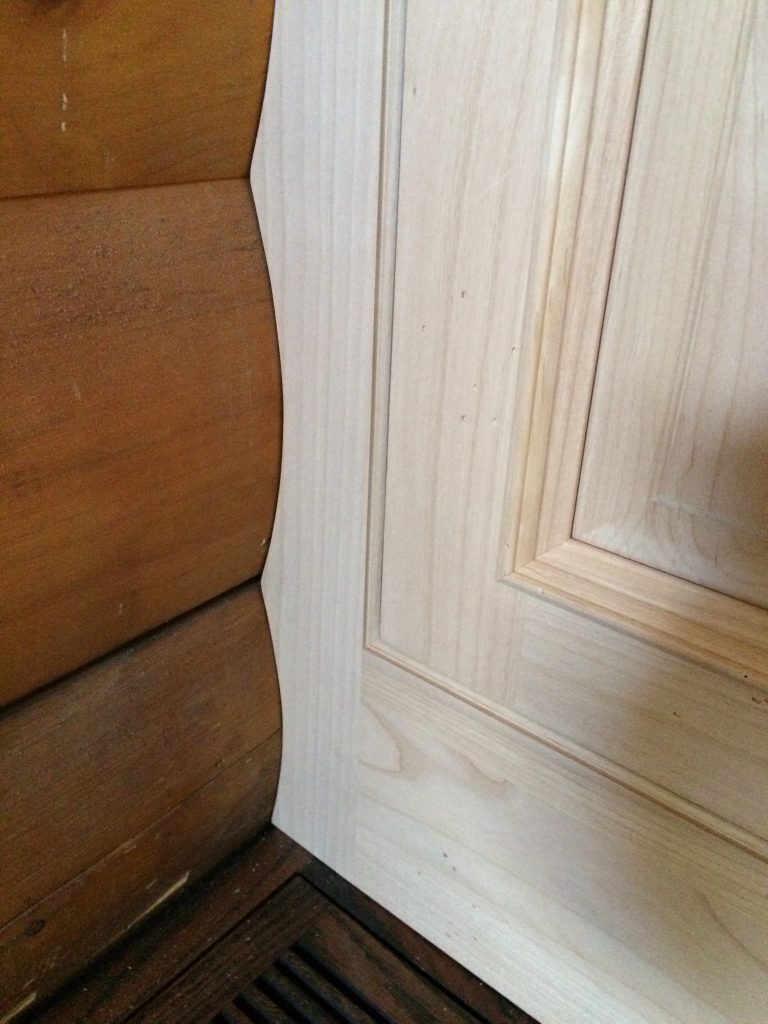
TURNING STEEL DOORS INTO WOOD-LOOKING DOORS
The other glaring distraction was the white steel doors everywhere. These could not stay white, but the budget did not allow for replacement, as the doors were still in good operating condition.
I enlisted my local artisan to do a faux-finish ‘graining’ on them to first make them feel like they were an intended architectural element of this log cabin, and secondly to carry through the authentic feel I was focused on for this renovation.
I also had the white door hinges changed to Oil-Rubbed Bronze finish.
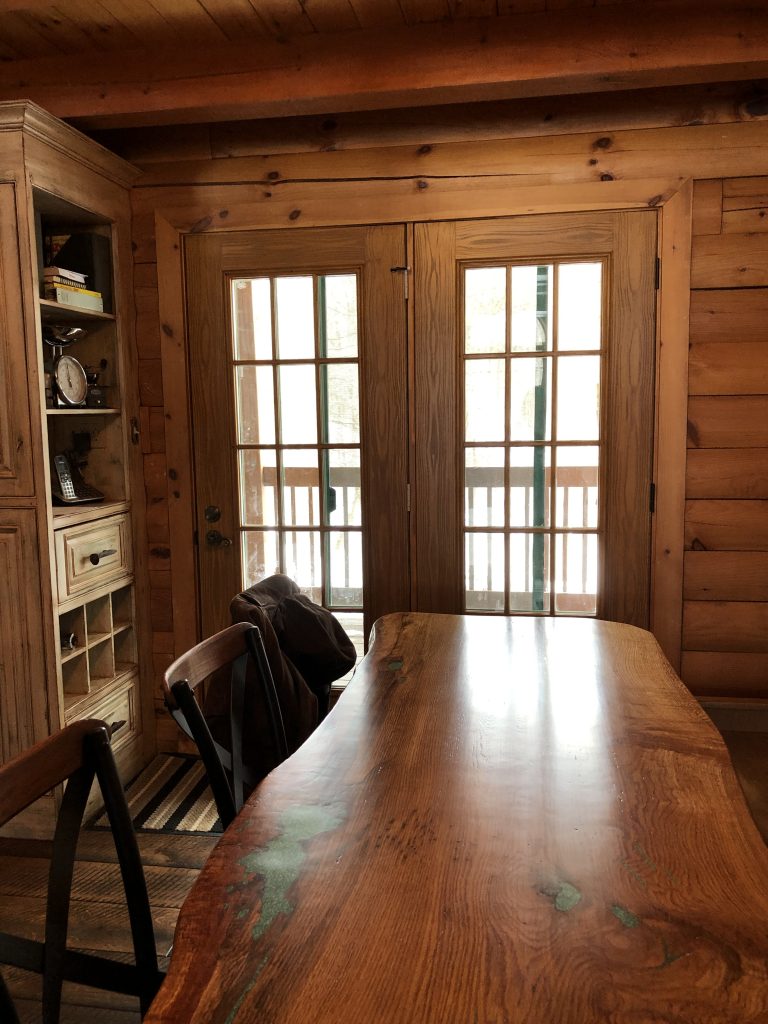
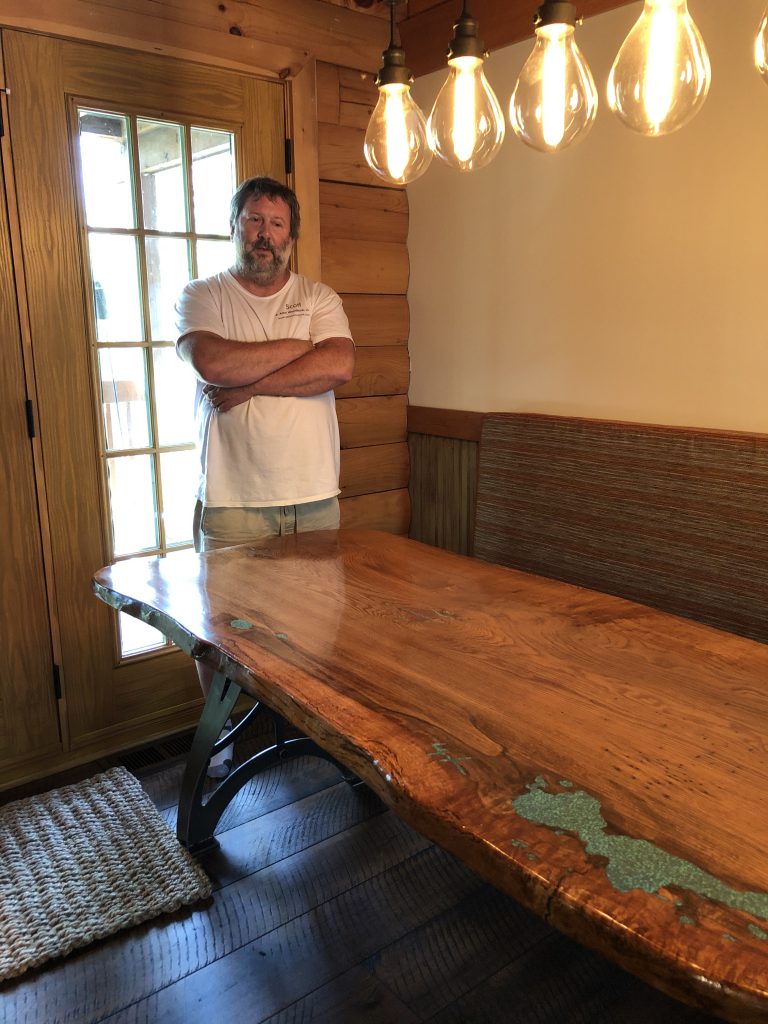
CUSTOM DINING TABLE FOR LOG CABIN RENOVATION
The last piece of the puzzle was finding a dining table that would accommodate the required number of guests, fit in the diminutive space, and have an industrial vibe. After coming up short with my regular vendors, I turned to my artisan contacts and got in touch with an artisan from the US to make the custom-sized table.
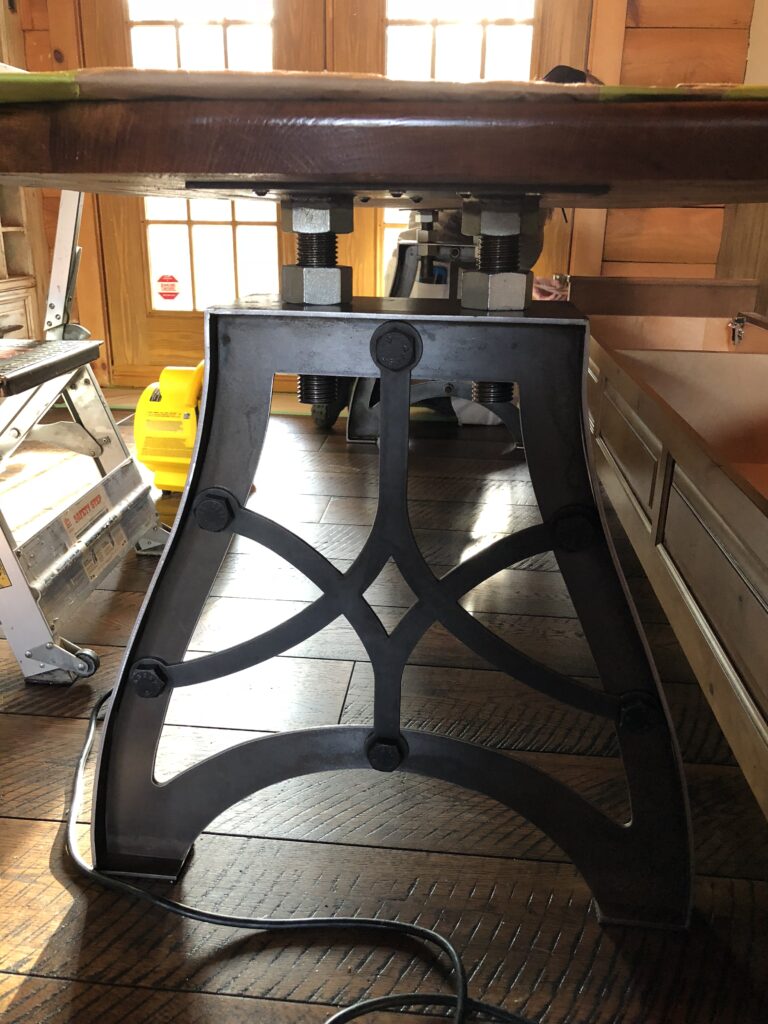
The industrial table bases I found were perfect for the industrial look we were after. The table top is fabricated from one solid piece of white oak (yes, that’s a big tree!), and the edges were left irregular on purpose. The natural voids in the tabletop were filled with turquoise-coloured resin that coordinates with the colour scheme, and the light above the kitchen sink.
There were a lot of people and trades involved in making this vision come to life, and we all worked really well together, which took the stress level down a notch. There was a lot of ‘behind the scenes work’ on my end that went on, probably the most I’ve ever put out for a space this size…. but it was definitely Worth The Wait!
Most clients don’t see or understand the amount of work (read hours) it takes to get a project to the ‘finish line’ as they say, and or how much myself and my team agonize over the smallest of details, but then if clients did know that they’d probably never do any renovations haha!
See the completed project and amazing transformation here ♥
Are you ready to transform your kitchen?
Find out how we can help you invigorate your kitchen project with clever design and distinctive details. Register below for a FREE 30-minute DISCOVERY call to see how we can help you!

You can also see a list of all of the services we offer here, or join us on Facebook or Instagram to see what we do behind the scenes, discover new product introductions and more inspiring photos.Select date and time:


Janet R Lorusso
| 2 February 2020Wow! Beautiful selections for this project! I love the lighting solution…it’s brilliant! (haha)
Anne-Marie Brunet
| 5 April 2020Thank you for the kind words Janet – much appreciated 🙂